Tag: Achievement Rewards

Clues To The Sky Tears Of The Kingdom...
Navigating the main quest titled Clues to the Sky in The Legend of Zelda: Tears of the Kingdom requires solving clever environmental riddles across Zora's Domain. Players must locate hidden figures, access sky islands, and execute precise actions to restore peace to the region. This guide breaks down every crucial step to complete the quest quickly and efficiently.
Locating King Dorephan in the Pristine Sanctum
The first major step in solving Clues to the Sky involves finding King Dorephan to receive the King's Scales. Eavesdropping on the Zora children near the throne room in Zora's Domain reveals hints about a secret hiding spot behind a waterfall.
Travel toward Lulu Lake near Ploymus Mountain to discover the entrance to the Pristine Sanctum. Inside this cave, players can speak directly with King Dorephan to receive the crucial scales needed for the puzzle.
Reaching the Land of the Sky Fish
With the King's Scales in hand, head over to Mipha Court and look toward the eastern sky. You will spot Floating Scales Island, a distinct sky structure shaped like a fish.
To reach this sky island, Link can stand on falling ruins and activate the Recall ability to ride the rock upward. Alternatively, equipping the Zora Armor allows players to swim directly up the cascading waterfall reaching down to the surface.
Solving the Droplet Puzzle
Once you arrive on Floating Scales Island, navigate to the central area and clear away any blocking sludge. Stand near the edge looking toward the southwest to spot floating rock fragments that form the outline of a teardrop.
Equip Link's bow and fuse one of the King's Scales directly onto your arrow. Shoot the fused arrow precisely through the center of the teardrop visual alignment to trigger a glowing light pillar in the lake below.
Completing the Quest and Moving Forward
Hitting the droplet target completes the puzzle requirements for Clues to the Sky and reveals the entrance to the Ancient Zora Waterworks. Return to Mipha Court to report your success to Prince Sidon and prepare for the next objective.
Clearing this quest opens up the path toward the Water Temple and brings you closer to purifying Zora's Domain. Ensure your equipment and supplies are fully stocked before diving into the upcoming dungeon challenges.

The Duchess Who Disappeared TOTK Quest Walkthrough
Exploring the vast frozen peaks of the Hebra region in The Legend of Zelda: Tears of the Kingdom leads Link into numerous memorable side adventures. Among these quests, tracking down missing legendary figures offers both narrative satisfaction and useful equipment rewards. Finding the famous shield surfer Selmie requires navigating icy terrain and overcoming subterranean rock barriers.
Starting the Quest in Hebra Mountains
Before players can begin this search, they must first complete the main story events surrounding the Rito Village region. Once the local weather settles, travelers can head toward the snowy slopes to meet Fin, one of Selmie's devoted students. Fin sets up a smoke signal while worrying about his mentor, who went missing after attempting to map out a new shield surfing trail.
Locating East Biron Snowshelf Cave
Following the trail down the slope leads adventurers toward a hidden cave entrance beneath the ledge. Inside the passage, progress is blocked by a heavy wall of cracked rocks that requires explosive force or heavy weapons to clear. Breaking through the obstruction reveals Selmie trapped near a bonfire inside the cave, waiting for someone to clear a way out.
Rescuing Selmie and Returning to the Lodge
After Link clears the rock wall leading toward the canyon, Selmie expresses her gratitude and invites him to her cabin on Hebra Peak. Fast traveling closer to the summit allows Link to easily drop down toward the bonfire marking Selmie's Lodge. Speaking with Selmie and her gathered students inside the lodge officially completes the quest and unlocks future surfing challenges.
Claiming the Strong Zonai Shield Reward
As a gesture of appreciation for her rescue, Selmie presents Link with a high-durability defense item. Players who keep an empty inventory slot will receive a Strong Zonai Shield to assist in their ongoing travels across Hyrule. Completing this endeavor opens up specialized shield surfing minigames across the mountain slopes.

Is Tales From The Borderlands Canon Story Connections...
Tales from the Borderlands stands as a unique entry in the iconic franchise, shifting away from fast-paced looter-shooter mechanics in favor of a narrative-driven episodic structure. Despite this drastic change in gameplay style, fans frequently ask whether the events in Rhys and Fiona's journey actually belong to the official lore. Gearbox Software has explicitly confirmed that the story is fully canon, making its narrative twists crucial to the overarching universe.
Official Place in the Borderlands Timeline
The events of Tales from the Borderlands take place directly between Borderlands 2 and Borderlands 3, specifically following the fall of Handsome Jack. This specific placement allows the story to explore the massive power vacuum left behind after Hyperion's collapse on Pandora. Understanding this timeline context helps explain how major corporate shifts shaped the galaxy before the arrival of the Children of the Vault.
Additionally, the narrative bridges key character developments that directly influence later entries in the franchise. Major events, such as the destruction of the Helios space station, are central plot points that originate in this episodic adventure. These events carry lasting consequences across the entire universe rather than remaining isolated side stories.
Crucial Character Arc Connections
Several central characters introduced or expanded in this narrative transition seamlessly into the main mainline titles. Rhys Strongfork evolves from a low-level Hyperion employee into the newly appointed CEO of Atlas Corporation, a role he actively maintains during Borderlands 3. Meanwhile, supporting characters like Vaughn adapt to life on Pandora, eventually founding their own bandit factions.
Legacy characters from previous games also make significant appearances that alter their future storylines. Scooter receives a emotional send-off that directly leads to legal and operational changes for Catch-A-Ride stations across Pandora. Seeing these character arcs unfold provides essential context for players returning to the primary shooter series.
Impact on Future Franchise Lore
The canon status of this episodic series established a foundation for how Gearbox handles narrative world-building going forward. By proving that narrative adventures can carry heavy canonical weight, it opened the doors for subsequent spin-offs like New Tales from the Borderlands. The overarching lore of Pandora continues to grow richer by integrating these character-driven storylines into the official universe timeline.

The World Ends With You Art Character Designs...
The World Ends With You stands out as one of the most visually distinct titles in modern role-playing video game history. Set against the backdrop of Shibuya's bustling youth culture, the game captures an urban aesthetic defined by bold outlines, expressive graffiti, and high-fashion character silhouettes. Understanding how these artistic choices shape the experience gives fans a deeper appreciation for the franchise's enduring creative legacy.
Urban Culture and the Shibuya Aesthetic
The art direction heavily reflects the real-world atmosphere of Shibuya's vibrant shopping districts and youth subcultures. Graphic elements like pop art, graffiti flourishes, and street motifs permeate every menu screen and battle interface. This strong sense of location grounds the game's supernatural elements in a tangible, modern setting.
Every environment uses sharp lines and dynamic perspectives to evoke the energy of city life. The inclusion of real fashion trends allows players to feel fully immersed in Shibuya's unique cultural landscape. These stylistic choices ensure the game remains recognizable even decades after its initial launch.
Collaborative Character Design Mastery
Character designs were spearheaded by key artists including Tetsuya Nomura and Gen Kobayashi, who brought distinct visual traits to the cast. Outfits were crafted to directly reflect each character's underlying personality, struggles, and narrative arc. For instance, Neku's initial closed-off demeanor is mirrored in his iconic headphones and high-collar outfit.
The secondary cast members also sport carefully chosen color palettes to avoid visual overlap during combat. From baggy streetwear to sleek Reaper uniforms, every attire choice tells a story without requiring words. This collaborative design approach ensures that every character feels distinct and visually memorable.
Dynamic Visual Effects and Sprite Artistry
In battle, the visual style comes alive through expressive 2D sprite animations and hand-drawn comic flourishes. The Noise enemies showcase creative hybrid designs, blending animal shapes with skeletal and tribal patterns. Heavy black ink lines and thick brushstrokes give each attack and movement a comic-book intensity.
Special abilities and pin attacks light up the screen with vibrant neon splashes and stylized typography. These dynamic effects maintain a high-energy pacing that matches the game's fast-paced soundtrack. The seamless combination of 2D art and stylized UI creates a cohesive vision from start to finish.
The Evolution into 3D and Modern Media
As the series expanded into anime adaptations and sequels like NEO: The World Ends With You, the signature visual language adapted to new formats. Transitioning into full 3D graphics required translating the classic thick-line art style into three-dimensional cel-shaded models. Designers meticulously preserved the exaggerated angles and expressive postures that fans love.
Whether in 2D or 3D, the franchise maintains a timeless visual identity that continues to inspire artists and gamers worldwide. The unique fusion of street fashion, anime aesthetics, and urban realism guarantees its place in gaming history.

How To Use PS4 Controller On Steam Connection...
Connecting a PlayStation 4 DualShock gamepad to your computer can transform your PC gaming experience, providing familiar ergonomics and precise physical controls for action games and platformers. Steam offers built-in support that automatically handles layout mapping, wireless pairing, and button translation for modern titles. Understanding the correct setup sequence allows you to quickly integrate your gamepad without requiring third-party drivers.
Connecting the PS4 Controller via USB or Bluetooth
The fastest way to link your controller is through a standard micro-USB cable plugged directly into an open USB port on your PC. Operating systems immediately recognize the gamepad, allowing Steam to detect it in seconds. This wired connection provides zero input latency and maintains a constant battery charge during long gameplay sessions.
If you prefer playing untethered, hold down the Share and PlayStation buttons simultaneously until the light bar begins flashing rapidly. Open your computer's Bluetooth settings menu, select the option to add a new device, and pair with the Wireless Controller entry. Once paired, Steam automatically establishes the connection whenever the controller powers on.
Enabling PlayStation Controller Support in Steam Settings
To ensure full functionality, launch the Steam client and navigate to the main Settings menu from the top navigation bar. Select the Controller tab on the left panel to access the active input configuration settings for your account. Toggling the option for PlayStation Configuration Support allows the launcher to translate DualShock inputs into standard game commands.
Enabling native support unlocks advanced options, including custom light bar color adjustments and haptic feedback tuning. Steam automatically creates temporary input profiles for games that natively lack Sony gamepad compatibility. This feature ensures smooth gameplay without needing external software utilities.
Customizing Keybindings and Touchpad Functions
Steam permits extensive personalization of controller layouts on a per-game basis through the Big Picture Mode overlay. You can remap individual face buttons, adjust analog stick deadzones, and calibrate trigger sensitivity according to personal preference. These personalized profiles save automatically to the cloud and load whenever you launch the associated title.
The DualShock 4 touchpad can also be configured as a multi-button menu or a secondary trackpad cursor for mouse navigation. Assigning utility shortcuts or map toggles to the touchpad surface streamlines menu navigation in complex RPGs. Exploring these custom controls enhances accessibility and overall comfort across your entire game library.
Troubleshooting Common Input and Connection Issues
If your gamepad fails to respond inside a game, check whether other conflicting controllers or flight sticks are active on your system. Disconnecting unused peripherals prevents input overlap and allows Steam to set the PS4 gamepad as the primary device. Restarting the Steam client often resolves minor driver detection glitches.
Running games in Big Picture Mode provides a dedicated controller overlay that helps verify button presses in real time. Keeping your Bluetooth drivers updated further guarantees stable wireless connections without sudden disconnections. Following these simple steps ensures a reliable and responsive control setup for all your favorite Steam games.

Diablo 4 Barrier Vs Fortify And How They...
Navigating the defense mechanics in Sanctuary is essential for surviving high-tier nightmare dungeons and tough boss encounters. Players frequently compare two of the primary defensive layers, Barrier and Fortify, to optimize their endgame character builds. Understanding how these systems absorb damage differently can vastly improve your survivability and skill synergy.
Understanding How Barrier Protects Your Health
A Barrier acts as a temporary shield that absorbs incoming damage before your actual Health pool is touched. This mechanism effectively functions as a second life bar, granting immediate protection against burst damage. Because it absorbs raw damage directly, it keeps your primary health intact during intense fights.
Barriers are typically generated through specific skills, passive abilities, and legendary aspects across various classes. Players looking for optimal gearing options can check out the to enhance their overall setup. Stacking bonus Barrier Generation further strengthens the total damage absorbed by these protective shields.
How Fortify Reduces Incoming Damage
Fortify works differently from a traditional shield by providing damage reduction rather than additional health. You become Fortified when your current accumulated Fortify pool equals or exceeds your current Health. Once active, it reduces all incoming damage by a baseline percentage, which can be further boosted with stats and gems.
Unlike temporary shields, Fortify builds up gradually during combat through dedicated attacks and skills. It remains active as long as you maintain your combat momentum and keep your Fortify level above your life bar. This makes it an ideal defense for frontline classes like Barbarians and Druids.
Key Differences Between Barrier and Fortify
The core distinction lies in how both mechanics handle incoming monster attacks. Barrier absorbs total damage outright before it reaches your health, making it an immediate shield against lethal hits. In contrast, Fortify mitigates incoming damage percentages while allowing your health pool to take modified hits.
Additionally, their duration and decay rules operate under distinct conditions during battle. Barriers usually expire after a set duration regardless of whether they take damage. Fortify drains naturally after leaving combat for several seconds, allowing players to carry built-up defense between consecutive monster packs.
Choosing the Right Defense for Your Build
Selecting between these two defensive strategies largely depends on your class choice and playstyle. Sorcerers and Rogues heavily rely on Barriers for quick absorption due to their limited access to Fortify mechanics. Tankier characters benefit immensely from Fortify due to synergies with Overpower damage and sustained damage mitigation.
In many high-level endgame setups, combining both defenses offers maximum protection. Using a Barrier buys time for your character to generate maximum Fortify without losing base health. Balancing these defensive layers creates a well-rounded character capable of tackling the hardest challenges in Diablo 4.

Mario Party 3 Box Art And Game Details
Released as the grand finale for the franchise on the Nintendo 64, Mario Party 3 stands out as a pivotal title in party gaming history. The game refined classic mechanics while introducing brand-new characters and modes that left a lasting impact on players. Examining both its distinctive regional box art variations and core gameplay systems provides a fascinating look into the end of an era for classic Nintendo hardware.
Distinctive Box Art Designs Across Regions
The packaging for Mario Party 3 varied significantly depending on the market, presenting different visual perspectives of the cast. In North America, the horizontal box layout placed characters like Mario, Wario, and newcomer Waluigi front and center to highlight dynamic multiplayer action. Meanwhile, the Japanese vertical box art offered a richer scene that featured new roster additions alongside classic villains standing atop a physical board game box.
Roster Expansions and Iconic Debut Characters
One of the most notable features of Mario Party 3 was its expanded playable roster. The game introduced Princess Daisy and Waluigi as playable roster options for the very first time in the main party series. These fresh additions joined original favorites like Mario, Luigi, Peach, Yoshi, Wario, and Donkey Kong, offering players a total of eight characters to choose from.
Innovative Gameplay and Duel Mode Mechanics
Beyond traditional board progression, Mario Party 3 revamped inventory management by letting players hold up to three items at once. It also introduced a dedicated Story Mode campaign alongside an inventive Duel Mode. In Duel Mode, two players competed on specialized boards using hired partners like Goombas or Chain Chomps to drain their opponent's stamina. Players seeking nostalgic memorabilia can explore to celebrate classic gaming moments.
The Legacy of 70 All-New Minigames
To keep competition fresh, developers packed the cartridge with 70 original minigames tailored for various player match-ups. These challenges ranged from chaotic 4-player free-for-alls to high-stakes 1v3 and 2v2 encounters. The title's clever balance between tactical item usage and mini-game skill helped solidify its reputation as a fan-favorite entry. Today, it remains celebrated as a peak achievement in local multiplayer design.

Fastest Way To Get To Level 30 League...
Reaching level 30 in League of Legends is a primary goal for many players eager to jump into competitive ranked matches. While the journey normally requires dozens of hours of play, applying targeted strategies can significantly accelerate your account progression. Understanding how match length, win rates, and experience mechanics function allows you to streamline the grind efficiently.
Optimizing Early Levels with Bot Matches
For accounts between levels 1 and 9, playing Co-op vs. AI games offers the fastest route to gain initial experience. Bot matches yield full experience payouts in this early bracket while allowing teams to finish games in record time. Selecting champions with fast wave clearing capabilities enables players to push lanes rapidly and earn quick victories.
However, relying solely on bot matches loses efficiency once an account reaches level 10 due to scaling penalties. After this threshold, experience gain from AI matches decreases noticeably, making PvP queues much more rewarding. Transitioning to normal games or game modes at this stage ensures your time investment returns maximum progression.
Choosing the Right Game Modes and Queues
When leveling past early brackets, choosing game modes with low queue times and high action helps maintain consistent hourly gains. Normal Summoner's Rift matches provide high base experience because payouts scale directly with match duration. Alternatively, fast-paced modes like ARAM offer quick matches and rapid turnarounds, keeping overall experience gains competitive per hour.
Focusing on victory remains the single most impactful factor for maximizing experience earnings across all queues. Winning a match grants roughly twenty percent more experience than a loss of equal duration. Playing comfort champions or queueing with reliable friends increases overall win rates, significantly shortening the path to level 30.
Leveraging Experience Multipliers and Account Perks
Utilizing active experience boosts is the most direct way to cut the total hours required to level up in half. Duration boosts double the experience gained from all completed matches, making them ideal for long gaming sessions. Combining these with win-based boosts stacks bonuses effectively for even faster progression.
Additional account integration perks can also provide permanent experience increases without requiring expensive purchases. For instance, linking an eligible gaming subscription service offers continuous account bonuses and grants immediate access to champions. Utilizing these efficient leveling methods ensures you unlock ranked play as quickly and smoothly as possible.

Fastest Way To Get To Level 30 League...
Reaching level 30 in League of Legends is a primary goal for many players eager to jump into competitive ranked matches. While the journey normally requires dozens of hours of play, applying targeted strategies can significantly accelerate your account progression. Understanding how match length, win rates, and experience mechanics function allows you to streamline the grind efficiently.
Optimizing Early Levels with Bot Matches
For accounts between levels 1 and 9, playing Co-op vs. AI games offers the fastest route to gain initial experience. Bot matches yield full experience payouts in this early bracket while allowing teams to finish games in record time. Selecting champions with fast wave clearing capabilities enables players to push lanes rapidly and earn quick victories.
However, relying solely on bot matches loses efficiency once an account reaches level 10 due to scaling penalties. After this threshold, experience gain from AI matches decreases noticeably, making PvP queues much more rewarding. Transitioning to normal games or game modes at this stage ensures your time investment returns maximum progression.
Choosing the Right Game Modes and Queues
When leveling past early brackets, choosing game modes with low queue times and high action helps maintain consistent hourly gains. Normal Summoner's Rift matches provide high base experience because payouts scale directly with match duration. Alternatively, fast-paced modes like ARAM offer quick matches and rapid turnarounds, keeping overall experience gains competitive per hour.
Focusing on victory remains the single most impactful factor for maximizing experience earnings across all queues. Winning a match grants roughly twenty percent more experience than a loss of equal duration. Playing comfort champions or queueing with reliable friends increases overall win rates, significantly shortening the path to level 30.
Leveraging Experience Multipliers and Account Perks
Utilizing active experience boosts is the most direct way to cut the total hours required to level up in half. Duration boosts double the experience gained from all completed matches, making them ideal for long gaming sessions. Combining these with win-based boosts stacks bonuses effectively for even faster progression.
Additional account integration perks can also provide permanent experience increases without requiring expensive purchases. For instance, linking an eligible gaming subscription service offers continuous account bonuses and grants immediate access to champions. Utilizing these efficient leveling methods ensures you unlock ranked play as quickly and smoothly as possible.
Where Do You Find Ginger In Dreamlight Valley...
Gathering ingredients is a central mechanic in Disney Dreamlight Valley, enabling players to prepare helpful meals, complete village quests, and boost friendship levels. Ginger is one such spice that serves a vital role in several late-game culinary dishes and key story progression tasks. Locating this spice requires access to specific areas of the map and a keen eye during daily foraging routines.
Where to Find Ginger in the Valley
Ginger grows exclusively in the Forgotten Lands, which is one of the final biomes players unlock during their play. You must clear Night Thorns blocking the path using Dreamlight to gain access to this dark and mysterious region. Once inside, you can spot Ginger stems sprouting wild directly from the dark soil throughout the area.
Unlike crops that require planting seeds and waiting for growth, Ginger spawns naturally across the terrain. Searching near the base of glowing trees and around the edges of the biome usually yields multiple harvesting nodes. Checking back regularly allows players to accumulate a healthy supply over time.
How to Properly Harvest and Store Ginger
Harvesting Ginger is straightforward and requires no specialized tools like a shovel or pickaxe. Players simply approach the leafy green shoots poking out of the ground and interact with them to gather the ingredient. Bringing along a companion assigned to the Foraging role gives you a strong chance to gain additional units with every harvest.
After collecting your daily yield, storing extra Ginger inside chest containers near your cooking stations is recommended. Keeping a steady stockpile ensures you can quickly craft necessary recipes without taking frequent trips back to the Forgotten Lands. It also allows you to complete surprise requests from villagers immediately.
Key Cooking Recipes and Uses for Ginger
Ginger is a versatile spice used in a wide variety of three-star, four-star, and five-star recipes across the game. Notable dishes include Ginger Gingerbread Houses, Teriyaki Salmon, and various aromatic tea beverages that restore significant energy. It is also required for specific story quests, such as brewing special Root Beer variants to advance major character arcs.
Beyond quest fulfillment, meals prepared with Ginger provide generous energy boosts when consumed during exploration. Feeding high-value Ginger meals to villagers is also an effective strategy to rapidly max out friendship levels. Understanding its full utility helps players prioritize foraging runs effectively.
Tips for Maximizing Your Foraging Efficiency
To optimize your gathering efforts, clear out extra obstacles like rocks and dark trees in the Forgotten Lands to make wild spawns easier to spot. Moving wild nodes closer to a central teleporter well can also speed up your daily collection route dramatically. Consistently visiting the biome ensures that new nodes spawn rapidly to replace the ones you harvest.

Dragon Ball Xenoverse 2 Parallel Quest List And...
Parallel Quests in Dragon Ball Xenoverse 2 serve as vital side missions that allow players to relive iconic battles, earn valuable experience, and gather essential items. Completing these challenges unlocks powerful skills, rare costumes, Zeni, and Super Souls necessary for optimizing your custom Time Patroller. Understanding how quest objectives and hidden conditions function is crucial for maximizing your rewards efficiently.
Understanding Parallel Quest Structure and Difficulty
Parallel Quests are categorized by star difficulty levels, ranging from basic one-star training exercises to intense high-tier encounters. As players advance through the main story campaign, new batches of quests become available in Conton City. Taking on higher-tier missions tests your combat mastery while offering significantly greater payouts.
Each quest features a primary winning condition alongside secondary requirements that trigger hidden events. Fulfilling these optional objectives yields an Ultimate Finish, which dramatically improves your chances of obtaining rare loot. Keeping track of hidden conditions helps streamline your farming strategy for specific abilities and gear.
Early Game Parallel Quests and Key Items
Low-level Parallel Quests focus on fundamental combat mechanics and early Dragon Ball story sagas, such as the Saiyan and Namek arcs. Quests like World Tournament Tag Team and Saibamen's Revenge offer essential clothing pieces and basic Super Attacks like Solar Flare or Meteor Strike. These early missions provide a solid foundation for new time patrollers starting their journey.
Additionally, early Namekian quests allow players to collect Dragon Balls and unlock iconic combat gear. Completing these stages with high rankings awards valuable Zeni and consumable items for tougher encounters ahead. Consistent participation in low-tier missions ensures steady character growth during the early campaign.
Unlocking Unique Rewards through Hidden Ultimate Finishes
To acquire the rarest skills and equipment in Xenoverse 2, players must trigger Ultimate Finishes by satisfying secret requirements. For instance, finishing a stage within a strict time limit or preserving a guest ally's health can summon powerful boss transformations. Defeating these extra foes directly unlocks exclusive Super Attacks and transformations.
Many popular skills, including specialized Kamehameha variants and defensive poses, are tied exclusively to these hidden outcomes. Players should monitor their battle timer and ally health gauges during every attempt. Successfully navigating these additional conditions ensures you collect every item listed in the quest rewards menu.
Farming Dragon Balls and Rare Equipment Efficiently
Certain Parallel Quests are famous among the community for featuring Time Patroller targets who drop Dragon Balls upon defeat. Defeating these wandering AI agents grants a key item prompt that translates to a Dragon Ball upon stage completion. Gathering all seven spheres allows you to make powerful wishes at the Shenron pedestal.
Replaying targeted missions like Explosion of Namek or Great Ape Festival remains the most reliable strategy for fast farming. Combining efficient route planning with high-damage skill setups reduces clear times significantly. Dedicated farming allows players to expand their character roster and acquire high-stat gear effortlessly.

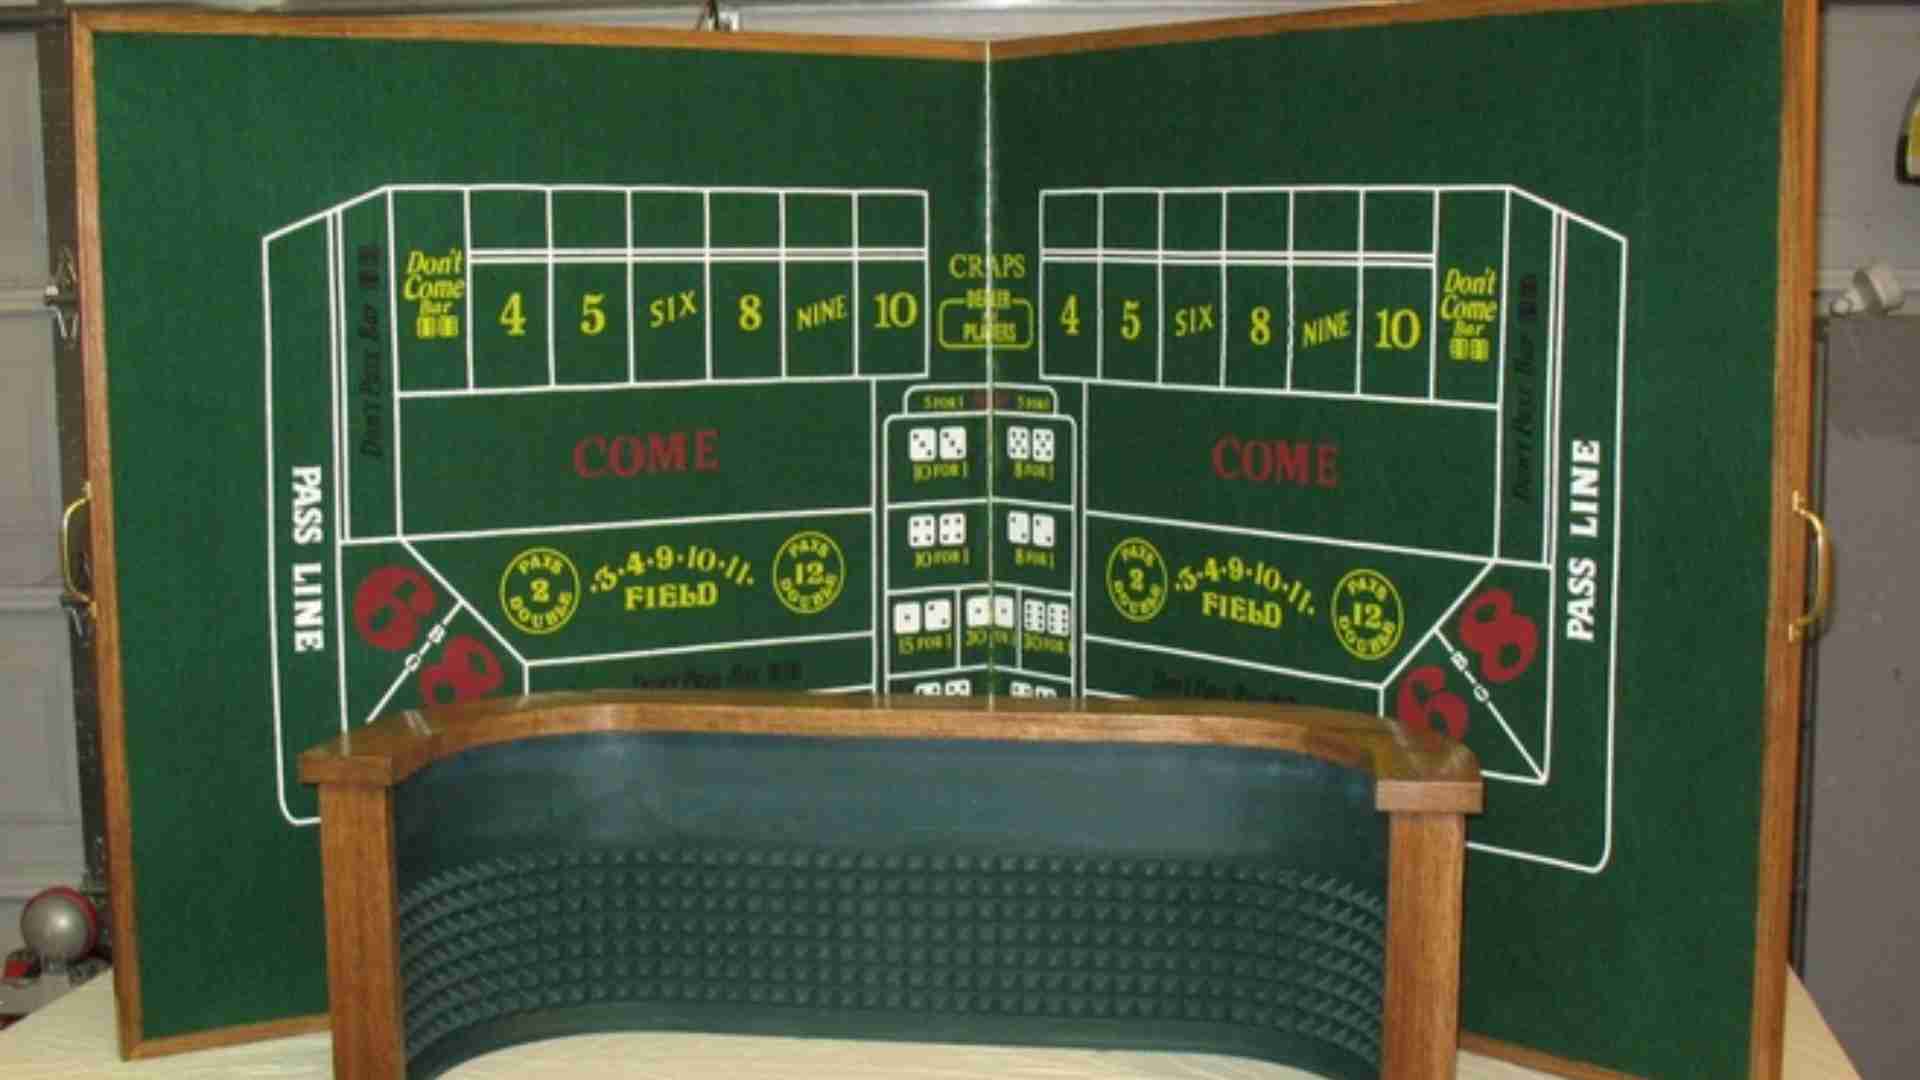
Rules of Betting in Poker and How Betting...
Mastering the structure of wagering in poker is essential for any player hoping to navigate the table with confidence. Whether playing in casual home games or competing in online arenas, understanding when and how to place chips dictates every strategic decision you make during a hand.
The Core Actions in Poker Betting
During any betting round, players are presented with specific choices based on the actions taken by opponents before them. You can fold your cards to exit the hand, call to match the current bet, or raise to increase the stake for everyone else at the table.
If no player has placed a bet in the current round, you also have the option to check, which passes the action to the next player without risking additional chips. Understanding how these actions interact allows players to build strategic pots and protect strong hands effectively.
Pre-Flop Action and Forced Bets
Every poker hand begins with forced bets known as the small blind and big blind, which ensure there are chips to play for before any cards are dealt. Once hole cards are distributed, the pre-flop betting round begins with the player sitting directly to the left of the big blind.
Players evaluate their starting cards to decide whether to call the big blind, raise to build a larger pot, or fold immediately. Dynamic platforms like m88 highlight how proper pre-flop positioning significantly influences overall hand strength and decision-making.
Post-Flop and Turn Decision Making
After the pre-flop round concludes, three community cards are revealed on the table, initiating the flop betting round. Action always begins with the first remaining player seated to the left of the dealer button, offering opportunities to check or bet based on how the community cards connected with their hand.
Following the flop, a fourth community card called the turn is dealt, opening another round of wagering. The betting stakes or strategic pressure often increase during this phase, as player hand combinations become much clearer with only one card left to reveal.
The River and Reaching the Showdown
The fifth and final community card is known as the river, giving active players their complete seven-card combination to evaluate. This final betting round represents the last opportunity to extra value from opponents or execute a well-timed bluff to force a fold.
If two or more players remain after all river bets are matched, a showdown occurs where participants reveal their hole cards. The player holding the highest-ranking five-card poker hand claims the accumulated pot, completing the hand structure.
Essential Rules for Betting Order and Sizing
Maintaining proper table etiquette requires acting strictly in turn and avoiding out-of-order calls or folds that ruin the game flow for others. Betting limits, whether fixed-limit, pot-limit, or no-limit, govern exactly how many chips a player can wager in a single turn.
Adhering to legal raise requirements ensures fair play across all betting rounds at the table. By practicing disciplined bankroll management and learning standard betting sequences, players can systematically improve their overall poker performance.

The Flash 2023 Movie Poster Exploring The Film...
The visual marketing campaign for the 2023 superhero film The Flash offered a striking preview of DC's multiverse storytelling through dynamic poster designs. By highlighting key figures and cinematic themes, the promotional artwork captured the high-stakes journey of Barry Allen across shifting timelines. Exploring the intricate details within these posters reveals how design choices framed the aesthetic direction of the entire motion picture.
Dynamic Visual Composition and Lighting
The poster artwork heavily relies on high-contrast lighting and fiery color palettes to convey the immense velocity of the Scarlet Speedster. Brilliant yellow lightning trails slice through dark, chaotic backdrops, creating a strong sense of urgency and motion. This visual technique emphasizes the destructive power of time travel while keeping the central hero in sharp focus.
Subtle atmospheric elements like crumbling debris and multidimensional reflections add depth to the composition. Designers placed key characters strategically within the frame to establish narrative hierarchy and scale. These deliberate visual cues effectively signaled to audiences that the story would span multiple worlds and eras.
Evolving Suit Aesthetics and Character Design
The primary promotional poster provides a detailed look at the modernized suit created for the titular hero. Upgraded materials give the costume a sleek, aerodynamic texture adorned with glowing yellow circuitry. This updated design balances comic book accuracy with a practical, cinematic look tailored for high-speed action scenes.
In addition to the central speedster, the poster prominently features alternate heroes who play vital roles in the multiverse narrative. The iconic silhouette of Michael Keaton's Batman and the imposing presence of Sasha Calle's Supergirl bring strong visual contrast to the artwork. Their distinct costume textures and heroic poses highlight the diverse character roster assembled for this cinematic event.
The Emotional and Multiversal Themes in Poster Art
Beyond action-packed imagery, the poster artwork subtly explores the core emotional themes of memory, loss, and destiny. Overlapping character profiles and shadowy figures suggest the complex web of choices confronting the protagonist. The visual balance between hope and tragedy is reflected in the stark contrast of bright lightning against dark environments.
By showcasing iconic symbols like the Batcave and the Speed Force, the poster serves as a bridge between nostalgia and modern storytelling. Fans and collectors alike appreciate how these artistic details preserve the legacy of classic DC heroes while expanding the cinematic universe. Ultimately, the poster design stands as an impactful artistic testament to one of DC's most ambitious feature films.

Disney Dreamlight With Great Power Quest Guide And...
Navigating the magical world of Disney Dreamlight Valley involves completing essential story missions to restore peace to the valley. One of the most critical early-game storylines is the "With Great Power..." quest, which unlocks after players gain access to the Dazzle Beach biome. This mission challenges players to explore underground locations, solve statutory riddles, and retrieve a key artifact necessary to protect the beach from the dark magic of The Forgetting.
Starting the Quest and Meeting Ursula
To begin this journey, players must unlock Dazzle Beach and speak with Merlin to learn about the mysterious curse affecting the shore. Following his instructions leads players directly to the Cursed Cave located in the northeastern section of Dazzle Beach. Inside the dark cavern, you will encounter Ursula, who grants you a Crystal Key needed to access the hidden Mystical Cave nearby.
After speaking with Ursula, head toward the western side of Dazzle Beach near the Pillar of Power to locate the Mystical Cave's entrance device. Place the key into the stone pillar to open the entrance and descend into the underground tunnels. Once inside, your main goal is to clear three magical gates by solving unique puzzles on each level.
Solving the Mystical Cave Gate Puzzles
The first gate tests your knowledge of minerals by requiring specific gems to match three colored statues. Players must insert a Peridot into the green statue, an Aquamarine into the blue statue, and a Garnet into the red statue to proceed. These gems can be mined from rock spots located around Dazzle Beach, Peaceful Meadow, and the Plaza.
The second gate presents a farming challenge where players must plant specific crops in front of three statues. You need to plant seeds for a Carrot, Wheat, and a Tomato in the dirt plots provided. Once all three crops are fully grown and watered, the second barrier will dissipate.
Cooking and Restoring the Orb of Power
The third and final gate requires players to harvest those exact three crops and prepare a meal at the nearby cooking station. Combining the Carrot, Wheat, and Tomato into the cooking pot creates a Veggie Pasta dish. Eating this dish immediately breaks the final barrier, granting access to the lowest chamber.
At the bottom of the cave, use your fishing rod on the golden ripple in the water to retrieve the Orb of Power. Head back outside and place the orb into the Pillar of Power to clear the dark magic from Dazzle Beach. Finally, return to Ursula and speak with Merlin to officially complete the quest and continue your adventure.

Viper Steel Sword Witcher 3 Location And Crafting...
The Viper Steel Sword is one of the earliest specialized Witcher gear pieces players can unlock during their journey through White Orchard. Wielding this weapon offers superior damage against human foes alongside valuable bonus stats like a chance to poison enemies. Acquiring the diagram early establishes a strong foundation for combat challenges ahead.
Locating the Viper Steel Sword Diagram
To find the crafting diagram, players must head toward the ruined castle located west of the Ransacked Village in White Orchard. The ruins are guarded by a band of renegade deserters who must be defeated before searching the area.
After clearing out the enemies, scale the collapsed wall on the southwest side of the structure to reach the upper ledge. You will discover a lootable chest sitting inside the broken tower containing the Serpentine steel sword diagram. Reading the accompanying document also triggers the quest to locate the matching silver sword diagram.
Required Crafting Materials
Forging the blade requires collecting four specific crafting components from the surrounding area. Players need one leather strap, one iron ingot, one flask of emerald dust, and one unit of venom extract.
Leather straps and iron ingots are readily available through general loot or by dismantling basic gear at a local merchant. Venom extract can be salvaged from defeated ghouls, while emerald dust drops from wraiths encountered around points of interest in White Orchard.
Where to Forge the Sword
Once all necessary components and diagrams are gathered, visit a qualified craftsman capable of making weapons. The quartermaster located within the Nilfgaardian Garrison in northwestern White Orchard can easily forge the weapon for a nominal fee.
Ensure you speak specifically with a swordsmith rather than an armorer when attempting to craft weapons. Equipped with your newly forged Viper Steel Sword, Geralt can comfortably take down bandit camps and human targets throughout the early chapters.

Baldurs Gate 3 Best Barbarian Build Skills And...
Mastering the Barbarian class in Baldur's Gate 3 requires a fine balance between raw physical power and tactical battlefield control. Known for their ability to withstand immense punishment while delivering devastating melee attacks, Barbarians serve as the ultimate frontline combatants in any party lineup. By choosing the right subclass, allocating key stats, and equipping optimal gear, you can transform your character into an unstoppable force.
Choosing the Subclass and Core Abilities
Selecting the Berserker subclass unlocks Frenzy, granting powerful bonus action attacks like Frenzied Strike and Enraged Throw. Prioritizing Strength and Constitution ensures high damage output alongside a robust health pool needed for prolonged encounters. Setting Dexterity to a moderate level provides crucial Armor Class bonuses when operating without heavy armor.
Subclass abilities heavily influence how you navigate chaotic skirmishes throughout the campaign. Berserkers excel at disrupting enemy spellcasters by throwing objects or foes across the arena to interrupt concentration. Selecting feats like Great Weapon Master significantly boosts damage per turn, especially when paired with advantage mechanics.
Essential Skills and Combat Mechanics
Athletics stands out as the most vital skill for Barbarians, directly impacting shove distance and resistance to forced movement. Perception and Survival further enhance exploration, allowing your warrior to spot hidden traps and ambushes before combat begins. Utilizing Reckless Attack provides consistent advantage on melee strikes, ensuring high-risk, high-reward offensive play.
Rage remains the foundational mechanic, mitigating physical damage types while granting extra weapon power. Managing your bonus actions efficiently allows you to maintain Rage benefits while repositioning across tough terrain. Combining high mobility with crowd-control shoves makes the Barbarian a versatile tactical asset.
Top Tier Equipment and Weapons
Early game gear like the Everburn Blade provides an immediate fire damage boost during initial encounters. Transitioning to Act II and Act III allows access to legendary weapons such as the Balduran Giantslayer, which doubles Strength modifier damage. Pairing these massive weapons with the Bonespike Garb or Adamantine Scale Mail maximizes damage reduction.
Accessories play a major role in augmenting passive survival capabilities and movement speed. Rings like the Ring of Flinging synergize exceptionally well with throwing builds, increasing projectile damage significantly. Helmets that grant immunity to critical hits keep your warrior standing through the toughest boss fights.
Optimizing Party Synergy and Playstyle
Barbarians thrive when supported by casters who can provide buffs like Haste or Longstrider prior to battle. Clerics and Wizards can control the battlefield with area-of-effect spells while the Barbarian draws enemy aggression away from squishier allies. Positioning your frontline warrior near choke points forces opponents into difficult tactical choices.
Maintaining a proactive approach in combat keeps enemies focused on your near-indestructible tank. Utilizing environmental hazards by throwing foes into chasms or elemental surfaces speeds up complex encounters. With the right setup, your Barbarian will comfortably lead the party through every challenge in Faerûn.

Scarlett Johansson Age In Iron Man 2 Cast...
The release of Iron Man 2 in 2010 marked a massive turning point for modern superhero cinema by introducing iconic comic book characters into a shared universe. Among the most notable additions was Natasha Romanoff, also known as Black Widow, brought to life by actress Scarlett Johansson. Fans frequently look back at this pivotal Marvel Cinematic Universe entry to learn more about her age during production, the ensemble cast, and how the film set the stage for future blockbuster releases.
Scarlett Johansson Age During Filming and Release
Scarlett Johansson was born on November 22, 1984, making her 24 years old during the principal photography of Iron Man 2 in 2009. By the time the film premiered in theaters in May 2010, she had celebrated her 25th birthday. Her youthful energy combined with a commanding screen presence made her portrayal instantly memorable to audiences worldwide.
Preparing for the physically demanding role required intense dedicated martial arts and stunt training. Despite being in her early twenties, Johansson performed impressive action sequences that established Black Widow as a formidable operative. Her commitment laid a strong foundation for her decade-long tenure in the franchise.
Overview of the Iron Man 2 Ensemble Cast
The movie features a star-studded cast led by Robert Downey Jr., who reprised his legendary role as Tony Stark. Gwyneth Paltrow returned as Pepper Potts, while Don Cheadle joined the franchise as James Rhodey Rhodes, taking over the armor to become War Machine. Their dynamic interactions added depth and humor to the evolving storyline.
Villainous threats were brought to life by Mickey Rourke as Ivan Vanko, a vengeful scientist wielding deadly plasma whips, and Sam Rockwell as rival industrialist Justin Hammer. Additionally, Samuel L. Jackson expanded his role as Nick Fury, the director of S.H.I.E.L.D. who oversees the superhero team-up initiative.
Key Movie Plot and Background Information
Directed by Jon Favreau, the sequel explores the political and personal pressure Tony Stark faces after revealing his superhero identity to the world. As his health declines due to his arc reactor core, he must overcome new rivals while protecting his technological innovations. The introduction of secret agent Natasha Romanoff disguised as a legal assistant creates compelling intrigue throughout the narrative.
The film grossed over six hundred million dollars globally, solidifying the commercial viability of multi-character superhero narratives. Beyond its immediate box office success, it successfully expanded the worldbuilding necessary for future ensemble crossover projects. It remains an essential viewing installment for cinema enthusiasts tracing the evolution of comic book adaptations.
Legacy and Impact on the Marvel Cinematic Universe
Johansson's debut in Iron Man 2 opened the door for expanded female representation in mainstream action blockbusters. Her character quickly grew into a central figure across multiple Avengers films and eventually earned a dedicated standalone feature film. The project proved that early casting choices could yield decade-long storytelling success.
Today, film history enthusiasts and casual viewers continue to analyze the production details and character arcs introduced during this era. Understanding the timeline of the actors and production offers valuable perspective on how ambitious cinematic projects are created. The movie stands as a foundational milestone in modern entertainment history.

Find Warners Lost Data Slate Complete Location And...
Tracking down missing items in vast open-world environments can often feel like searching for a needle in a haystack, especially when navigation markers are vague or entirely missing. In many modern RPGs and sci-fi adventures, retrieving personal items like Warner's lost data slate is essential for completing side objectives and unlocking localized lore. Understanding the exact search area and environmental clues allows players to secure the item efficiently without spending unnecessary time wandering through hostile territory.
Initiating the Search Objective
Before heading out into the field, players must formally accept the assignment from the quest giver to ensure the item spawns correctly in the game world. Interacting with NPCs in the central settlement usually provides background details regarding why the information on the slate is so vital. Keeping track of dialogue logs helps clarify whether the item was dropped during a routine patrol or misplaced during an enemy ambush.
Pinpointing the Location of the Data Slate
The lost slate is situated near an abandoned outpost located along the eastern ridge of the outer perimeter. Players should look for a damaged storage container positioned right next to a cluster of solar panels. Checking nearby tables, crates, and debris fields ensures you do not overlook the item, as its small metallic frame can easily blend into the environment.
Overcoming Obstacles and Retrieving the Item
Approaching the search location requires caution because local wildlife or roaming hostile factions frequently patrol the surrounding ruins. Engaging enemies from a distance or using stealth tactics allows players to clear the perimeter safely before searching for the slate. Once the area is secured, simply walk up to the highlighted item and interact with it to add the data slate to your inventory.
Returning to Warner and Claiming Rewards
With the recovered data slate in hand, travel back to the main outpost to hand the item over to Warner. Completing this objective updates your quest log and grants valuable experience points along with local currency rewards. Delivering the missing information may also unlock additional dialogue options or trigger follow-up missions within the local settlement.

Vegetarian Pizza Recipe Dreamlight Valley Ingredients And Cooking...
Cooking plays a vital role in Disney Dreamlight Valley, providing players with valuable energy boosts, high-value items for selling, and key quest progression. Among the many culinary creations available at your cooking station, the Vegetarian Pizza stands out as a top-tier five-star entrée. Understanding how to source each ingredient efficiently ensures you can quickly prepare this dish whenever a villager requests it or when you need a major stamina refill.
Required Ingredients for Vegetarian Pizza
To make a Vegetarian Pizza in Disney Dreamlight Valley, players must collect five specific items before heading to a cooking pot. The standard recipe requires one Tomato, one portion of Cheese, one bundle of Wheat, and two of any general Vegetable. Using the correct combination ensures you receive the intended five-star meal without wasting rare components.
Gathering these items involves a mix of farming, foraging, and purchasing goods from various valley locations. Wheat seeds can be purchased cheaply from Goofy's Stall in the Peaceful Meadow, while Tomatoes are bought at his Dazzle Beach shop. Cheese is easily obtained by visiting Chez Remy and purchasing dairy products directly from the restaurant pantry.
Sourcing the Additional Vegetables
The remaining two ingredients can be any vegetable items currently stored in your inventory. Common and easy options include Carrots from the Peaceful Meadow or Bell Peppers from the Forest of Valor. Mixing options like Zucchini, Cucumbers, or Eggplants will also satisfy the requirement successfully.
Using basic grown crops allows players to save rarer materials for other complex recipes. If you want to optimize your farm output, keeping a steady stock of quick-growing vegetables like Carrots ensures you are always prepared to cook. This flexibility makes the Vegetarian Pizza an accessible high-tier meal for both new and experienced players alike.
Step-by-Step Cooking Instructions
Once all five ingredients are in your backpack, interact with any stove or cooking station throughout the valley. Place one Wheat, one Cheese, one Tomato, and your two selected Vegetables into the pot, then consume one Coal Ore to begin cooking. Once completed, the five-star dish will instantly be added to your inventory.
Preparing this dish is beneficial for boosting character friendship levels through daily favorite gift interactions. Furthermore, consuming the pizza restores a significant amount of stamina, making exploration and resource gathering far more efficient. Understanding the process allows players to streamline their daily valley routines with ease.

Disney Dreamlight Valley Red Falling Penstemon Location And...
Foraging flowers across the biomes of Disney Dreamlight Valley is a core gameplay element required for crafting, decorating, and completing villager questlines. Among the various flora scattered throughout the realm, the Red Falling Penstemon stands out due to its distinctive drooping petals and vibrant color. Locating and utilizing this specific flower effectively can help players complete crucial tasks and enhance their village design.
Where to Find Red Falling Penstemon
The Red Falling Penstemon spawns naturally exclusively within the Plaza biome, which serves as the central hub of your valley. Players can easily spot its vivid red blossoms growing randomly on grassy patches near buildings and pathways. Since it shares spawn slots with other penstemon variants, picking up all visible flowers in the Plaza will encourage new Red Falling Penstemons to grow.
Understanding the respawn mechanics ensures a steady supply of this botanical resource during daily gameplay sessions. Once harvested, flowers in the Plaza typically take roughly twenty to thirty minutes to regenerate. Clearing the entire area regularly maximizes your chances of acquiring multiple red variants within a single playthrough.
Crafting and Decorative Uses
Red Falling Penstemon is primarily used as a vital ingredient in various crafting recipes available at the workbench. Players often need this flower to assemble colorful flower pots, decorative fences, and customized outdoor furniture arrangements. Using natural flora helps transform the valley landscape into a personalized haven for favorite Disney characters.
Beyond structural items, this flower is frequently used to manufacture red dyes and themed crafting materials. Collecting sufficient quantities allows players to complete complex furniture sets without running out of key components. Keeping a designated storage chest for forageables guarantees you always have materials ready for new decor projects.
Quest Requirements and Villager Gifts
In addition to crafting, the Red Falling Penstemon plays an important role in fulfilling daily villager requests and progressing character questlines. Gifting a villager one of their favorite items of the day grants a substantial boost to your friendship level. When this red blossom appears on a character's preference list, delivering it quickly accelerates your progression.
Certain story quests assigned by iconic characters also demand specific flora to advance the narrative. Having Red Falling Penstemon stored in advance prevents unnecessary delays when completing multi-step missions. Paying attention to daily gift rotations ensures you never miss an opportunity to build stronger bonds with valley residents.
Tips for Efficient Flower Harvesting
To optimize your gathering routine, consider organizing the Plaza to make foraging more manageable. Clearing unnecessary clutter and grouping trees together provides open grass fields where flowers are much easier to see. This simple layout adjustment reduces the time spent searching for small plant spawns.
Another effective strategy is bringing along a companion assigned to the Foraging role while exploring the Plaza. Harvesting nodes alongside a high-level foraging buddy offers a chance to duplicate your yields automatically. This approach significantly increases your inventory output while saving valuable time during daily valley maintenance.

Granblue Fantasy Relink Tier List Best Characters Ranked
Navigating the endgame content in Granblue Fantasy Relink requires a clear understanding of how different party members perform in high-difficulty raids. With a wide roster of crewmates available, players must balance raw damage output, defensive utility, and overall team synergy. Evaluating the strongest picks helps players invest their precious resources effectively across different stages of progression.
Top Tier Active Player Characters
For players who prefer direct manual control, characters with high execution ceilings and rapid stance shifts offer unmatched performance. Narmaya and Lancelot stand out as exceptional active combatants due to their rapid burst damage and extensive invulnerability frames during intense boss encounters. Mastery of their skill combos allows players to hit damage caps consistently while avoiding dangerous mechanic overlaps.
Sandalphon and Cagliostro also earn top spots in player-controlled setups. Sandalphon delivers relentless damage stability, while Cagliostro enhances the entire party through powerful offensive buffs and reliable healing options. Choosing these characters ensures maximum output during challenging Proud difficulty quests.
Best AI Teammates for Solo Progression
Building a competent offline squad requires analyzing how automated CPU logic handles specific character kits. Range and simplicity heavily influence AI performance, making certain allies far more reliable than complex melee fighters. Eugen and Rosetta rank at the top of AI tiers because the computer tracks targets effortlessly from long range while maintaining high uptime.
Support-oriented characters like Cagliostro also excel under computer control, as her key contributions stem from team utility rather than precise manual execution. Utilizing these reliable companions eliminates positioning errors and guarantees steady progress through repeated boss trials.
Balanced Support and Stagger Specialists
A well-rounded team setup needs more than just pure damage dealers to tackle late-game overdrive mechanics. Characters like Percival and Yodarha bring exceptional crowd control, defense debuffs, and valuable party shields to survive heavy attacks. Their presence makes long, multi-phase battles significantly safer for the whole group.
Understanding role coverage helps players form synergistic teams that maintain high damage output while remaining resilient. Pairing heavy stuns with strong ranged options creates consistent windows for massive Skybound Art chains.
Optimizing Your Party Setup
To maximize success in endgame content, players should focus on matching active choices with compatible AI builds. Investing Sigils and Mastery Points into a focused core team yields faster clear times than spreading resources too thin. Tailoring your squad composition ensures a smooth transition through the game's toughest challenges.

Granblue Fantasy Relink Tier List Best Characters Ranked
Navigating the endgame content in Granblue Fantasy Relink requires a clear understanding of how different party members perform in high-difficulty raids. With a wide roster of crewmates available, players must balance raw damage output, defensive utility, and overall team synergy. Evaluating the strongest picks helps players invest their precious resources effectively across different stages of progression.
Top Tier Active Player Characters
For players who prefer direct manual control, characters with high execution ceilings and rapid stance shifts offer unmatched performance. Narmaya and Lancelot stand out as exceptional active combatants due to their rapid burst damage and extensive invulnerability frames during intense boss encounters. Mastery of their skill combos allows players to hit damage caps consistently while avoiding dangerous mechanic overlaps.
Sandalphon and Cagliostro also earn top spots in player-controlled setups. Sandalphon delivers relentless damage stability, while Cagliostro enhances the entire party through powerful offensive buffs and reliable healing options. Choosing these characters ensures maximum output during challenging Proud difficulty quests.
Best AI Teammates for Solo Progression
Building a competent offline squad requires analyzing how automated CPU logic handles specific character kits. Range and simplicity heavily influence AI performance, making certain allies far more reliable than complex melee fighters. Eugen and Rosetta rank at the top of AI tiers because the computer tracks targets effortlessly from long range while maintaining high uptime.
Support-oriented characters like Cagliostro also excel under computer control, as her key contributions stem from team utility rather than precise manual execution. Utilizing these reliable companions eliminates positioning errors and guarantees steady progress through repeated boss trials.
Balanced Support and Stagger Specialists
A well-rounded team setup needs more than just pure damage dealers to tackle late-game overdrive mechanics. Characters like Percival and Yodarha bring exceptional crowd control, defense debuffs, and valuable party shields to survive heavy attacks. Their presence makes long, multi-phase battles significantly safer for the whole group.
Understanding role coverage helps players form synergistic teams that maintain high damage output while remaining resilient. Pairing heavy stuns with strong ranged options creates consistent windows for massive Skybound Art chains.
Optimizing Your Party Setup
To maximize success in endgame content, players should focus on matching active choices with compatible AI builds. Investing Sigils and Mastery Points into a focused core team yields faster clear times than spreading resources too thin. Tailoring your squad composition ensures a smooth transition through the game's toughest challenges.

Unable to Load Persistence Data: Causes and Troubleshooting...
Encountering the "Unable to Load Persistence Data" error can completely disrupt your online gaming sessions and prevent you from connecting to live servers. This error typically signifies a communication failure between your local platform and the game's remote backend infrastructure. Understanding why this connectivity block occurs is the first step toward restoring your online access smoothly.
Understanding the Root Causes of Persistence Data Errors
This persistent connection error usually stems from server-side outages or temporary disruptions within official game networks. When central authentication nodes experience heavy traffic or scheduled maintenance, player profiles fail to load proper saved session state information. Additionally, local network instability, corrupt cache files, or restrictive firewall configurations can block necessary data transfer requests.
Basic Network Troubleshooting and Router Resets
Before modifying complex system settings, performing a complete power cycle of your home networking equipment often resolves temporary connectivity hiccups. Unplug your modem and router from power for at least sixty seconds before turning them back on. Restarting your gaming console or PC immediately afterward forces your system to establish a fresh connection to your internet service provider.
Flushing DNS and Refreshing System Network Cache
Corrupted local network caches frequently interfere with server handshakes, leading to persistent data errors during login sequences. PC users can resolve this by launching Command Prompt as administrator and running standard DNS flush commands. Console users can achieve a similar cache refresh by performing a complete hard restart and clearing their system network settings.
Adjusting Firewall and DNS Server Settings
Sometimes default DNS servers provided by local internet providers fail to resolve fast-changing gaming server addresses efficiently. Switching your system's primary DNS settings to reliable public options like Google DNS or Cloudflare often improves connectivity stability. Furthermore, ensure that your security software or Windows Firewall isn't actively blocking inbound or outbound traffic required by online titles.

How to Fix Popla Foothills Skyview Tower in...
Exploring the expansive world of Hyrule requires mapping out every region to easily navigate key landmarks and sky islands. When players arrive at the Popla Foothills Skyview Tower, they quickly notice that the activation terminal is unpowered and unresponsive. Fixing this landmark involves a quick rescue mission beneath the surface to free an unequipped mechanic.
Locating the Inactive Terminal and Nearby Clues
The Popla Foothills Skyview Tower sits perched on high ground south of Hyrule Field near the Faron Grasslands border. Upon reaching the entrance, interacting with the terminal reveals that the console lacks electrical power. Just outside the structure, players will spot the Popla Foothills North Well. Jump down into the well to hear calls for help coming from deep inside the cave system.
Finding the Trapped Mechanic Underground
Navigating through the well leads to a set of cracked boulders blocking a side path. Break through these obstacles using a hammer weapon or bomb flowers to reveal a hidden passageway. Down the hall, you will encounter Elmerson, an inspector locked inside a gated cell. He explains that he accidentally triggered a trap while investigating rumors of local treasure.
Reaching the Popla Foothills Excavation Site
Because the cell door cannot be opened from inside the well, use the Ascend ability to return directly to the surface. Head south from the tower and drop down the edge of the cliff face. Look for the entrance to the Popla Foothills Excavation Site cave near the base of the mountain. Enter the cave tunnel and follow the main path until you reach the opposite side of Elmerson's locked cage.
Releasing Elmerson and Restoring Power
In front of the cage, you will see a large floor switch embedded in the ground. Step onto the switch or place a heavy object on top of it using Ultrahand to open the iron gate. Elmerson will express his gratitude, reward you with Rupees, and immediately return to the surface to repair the tower console. Use Ascend once again to pop back up to the tower grounds.
Activating the Tower and Mapping the Region
When you return to the Skyview Tower, Elmerson will be standing beside the fully functional control terminal. Interact with the blue panel to initialize the launch system and step onto the central pad. Launching into the air updates your map for both the surface and sky regions surrounding Lake Hylia and the Faron region. This also creates a permanent fast travel point for future journeys across Hyrule.

Is Intel Iris Xe Graphics Good For Gaming...
Intel Iris Xe Graphics represents a significant leap forward for integrated graphics processing in thin and light laptops. While it is not designed to replace dedicated gaming graphics cards, it provides surprisingly competent performance for casual gamers and esports enthusiasts. Understanding its capabilities and limitations helps users set realistic expectations before diving into modern gaming titles.
Understanding the Performance of Intel Iris Xe
Intel Iris Xe relies on system RAM to operate, meaning memory speed and configuration heavily influence overall gaming performance. Laptops with dual-channel RAM deliver noticeably higher frame rates compared to single-channel setups. For light gaming, this integrated GPU manages heat efficiently while consuming minimal power during long play sessions.
Compared to older UHD graphics solutions, Iris Xe features up to 96 execution units that handle visual rendering much more effectively. This allows players to run mid-tier titles at reasonable resolution settings without experiencing severe stuttering or constant frame drops. It serves as an accessible entry point for everyday laptop users who enjoy gaming on the side.
Popular Esports and Competitive Games That Run Well
Competitive multiplayer titles are generally optimized to run smoothly on a wide variety of hardware configurations. Games like Valorant, League of Legends, and Counter-Strike 2 achieve high frame rates on Intel Iris Xe at 1080p resolution. Lowering visual settings slightly ensures stable performance during intense team fights and high-action moments.
Rocket League and Overwatch 2 are also fully playable on Iris Xe graphics with adjusted graphical presets. Gamers can expect playable frame rates ranging between 40 to 60 frames per second on medium settings. These optimized titles demonstrate that high-octane competitive play does not always require an expensive dedicated GPU.
Handling Demand AAA Titles and Story-Driven Games
Running modern AAA releases on Intel Iris Xe presents a much tougher challenge for integrated hardware. Blockbuster games like GTA V, The Witcher 3, and Skyrim run smoothly if render resolution and detail settings are turned down. However, extremely demanding recent titles like Cyberpunk 2077 or Alan Wake 2 will struggle to maintain playable frame rates.
Indie adventures and strategic titles tend to perform exceptionally well on integrated setups. Players exploring indie hits often check resource guides like contoh.com to optimize their laptop settings for various gaming genres. Lowering resolution to 720p or using resolution scaling features can help heavier games reach comfortable framerates.
Tips to Maximize Gaming Performance on Iris Xe
Optimizing system software plays a vital role in squeezing extra performance out of integrated graphics. Keeping Intel graphics drivers updated guarantees compatibility patches and performance fixes for new releases. Closing resource-heavy background applications frees up valuable system memory for active games.
Adjusting power settings to high performance ensures the CPU and GPU receive maximum power during gameplay. Utilizing dynamic resolution scaling or Intel XeSS upscaling technology can dramatically improve framerates in supported titles. These small tweaks collectively turn a standard productivity laptop into a capable casual gaming machine.

Level Fun Escape The Backrooms Walkthrough And Survival...
Navigating the surreal and terrifying corridors of the Backrooms brings players face-to-face with numerous unsettling environments, but few are as deceptively dangerous as Level Fun. This infamous zone masks its true horrors behind a facade of childhood birthday parties, complete with bright colors, balloons, and cake. Survival requires looking past the cheerful decorations to understand the lethal threats waiting around every corner.
Understanding the True Nature of Level Fun
This level presents itself as a vibrant party venue filled with tables, gifts, and confusing nursery decorations. However, this playful aesthetic is a clever trap designed by the entities residing within to lure unsuspecting wanderers into a false sense of security. Remaining vigilant and ignoring the cheerful ambiance is the first step toward finding a viable exit route.
The atmosphere is engineered to cause sensory overload while clouding your spatial awareness. Music tracks play on a continuous loop, making it exceptionally difficult to hear approaching dangers or audio cues. Successful navigation relies on your ability to filter out these background distractions and focus purely on your physical surroundings.
Identifying and Avoiding the Partygoers
The primary threat inside this zone comes from the highly aggressive and intelligent entities known as Partygoers. These creatures possess tall, smooth, yellowish bodies with a carved smile that matches the unsettling theme of the environment. They operate with a hive-mind intelligence, meaning alerting one creature will quickly draw the attention of nearby hunters.
Stealth is your absolute best defense when exploring these chaotic, balloon-filled rooms. Move crouched behind the large tables and party pillars to break line of sight whenever a creature wanders nearby. If you are spotted, do not attempt to fight them, as their physical strength can easily overwhelm an unprepared traveler.
Key Survival Strategies and Resource Management
Before attempting to escape, you must manage your physical stamina and mental sanity carefully. The psychological distress caused by the looping music and shifting walls can quickly drain your focus. Keeping a steady supply of Almond Water on hand will help stabilize your mind during high-stress encounters.
It is crucial to avoid touching any food or drinks left out on the party tables. These items are often contaminated or placed intentionally as bait to keep wanderers in one spot for too long. Stick exclusively to the supplies you brought with you to ensure your physical safety throughout the journey.
Locating the Secret Exit Points
Escaping this level requires finding specific environmental anomalies hidden among the decorations. One of the most reliable exit methods involves searching for a distinct blue door tucked away in the back corners of the main party halls. Noclipping through this specific doorway will safely transport players back into more manageable sectors of the complex.
Alternatively, players can search for rare ceiling openings where the colorful decorations give way to dark, exposed pipes. Finding a way to climb into these vents offers another path out of the chaotic celebration. Whichever route you choose, swift decision-making is necessary to ensure you do not get cornered by the resident entities.

Silent Hill F Shrine Vault Puzzle Solution And...
Navigating the eerie, flower-infested environments of Silent Hill F requires a keen eye for environmental details and a steady nerve. Among the various obstacles players encounter, the intricate Shrine Vault puzzle stands out as a major milestone that blocks forward story progression. Understanding the mechanics of this supernatural mechanism will help you bypass the danger and secure the vital items hidden within.
Locating the Hidden Shrine Vault
Before attempting to crack the mechanism, you must first locate the subterranean sanctuary hidden beneath the main courtyard structures. The entrance is obscured by thick red spider lilies that part only after you complete the preliminary village investigation sequences. Exploring the surrounding corridors carefully ensures you do not miss the subtle acoustic cues signaling your proximity to the vault.
As you approach the heavy stone threshold, dynamic shadows and rustling petals create a deeply unsettling atmosphere. It is highly recommended to clear any nearby threats in the immediate area before interacting with the central pedestal interface. This preparation allows you to focus entirely on deciphering the cryptic symbols without fear of a sudden ambush.
Deciphering the Cryptic Sigil Symbols
The core of the puzzle revolves around matching a sequence of four ancient Japanese floral motifs engraved onto sliding stone cylinders. To find the correct combination, players must study the large, tattered paintings hanging along the damp perimeter walls of the chamber. Each canvas contains a subtly highlighted pattern that corresponds directly to one of the slots on the main vault mechanism.
Examining these artistic pieces from left to right reveals a hidden chronological narrative that dictates the exact input order. Pay close attention to the specific shading variations and the arrangement of the withered petals depicted in the background of each artwork. These visual elements provide the foundational logic needed to align the rotating stone dials correctly.
Completing the Dial Alignment Sequence
Once you have noted the correct order from the wall paintings, return to the central pedestal to manipulate the interface. Turn the first cylinder until the cracked blossom icon faces upward, which unlocks the secondary mechanical gears. Follow this by aligning the subsequent dials to reveal the matching seasonal representations in perfect chronological succession.
If you enter an incorrect pattern, the stone mechanism will emit a low grinding noise and completely reset your current progress. Taking your time to double-check each individual alignment avoids frustrating repetition and keeps your exploration efficient. Aligning the final crest triggers a profound environmental shift, causing the heavy vault doors to slowly slide open.
Securing Your Rewards and Escaping Safely
Successfully unlocking the vault rewards you with the ceremonial brass mirror, a crucial quest item needed to dispel the larger corruption blocking the town exit. Additionally, players will discover an archival document detailing the dark history of the shrine origins resting on the stone altar. Gathering these valuable materials immediately triggers a dangerous horde encounter, forcing you to think quickly on your feet.
The narrow entry tunnel provides an excellent tactical bottleneck to manage the oncoming wave of shifting floral adversaries. Utilize your defensive tools effectively and push backward toward the main courtyard to avoid being entirely surrounded in the small chamber. Escaping the area safely allows you to save your progress and continue your harrowing journey through the cursed village.

Fall of Cybertron Optimus Prime Story and Character...
The apocalyptic final days of the Transformers' homeworld are beautifully captured in the classic video game narrative, showcasing a society on the brink of total collapse. At the center of this tragic epic stands the iconic Autobot commander, whose evolution from an idealistic believer to a battle-hardened general defines the emotional stakes of the conflict. Understanding his narrative arc and tactical role provides crucial insight into one of the most celebrated representations of the character in gaming history.
The Burden of Leadership on a Dying World
In this dark chapter, the newly appointed leader faces the monumental task of preserving his species while the very core of Cybertron shuts down from heavy warfare. Unlike older iterations where his authority is firmly established, this story highlights the immense pressure and self-doubt that comes with guiding a desperate evacuation effort. He must constantly balance his deeply ingrained pacifist philosophy against the brutal military realities imposed by a ruthless Decepticon uprising.
His central focus shifts from winning a localized planetary war to ensuring the survival of his people through the construction of the Ark. This massive transport vessel represents the final hope for the Autobot faction as resource reserves completely dry up across the metallic landscape. Every decision he makes carries heavy consequences, forcing him to sacrifice historic landmarks and valuable energy reserves to keep the evacuation plan on schedule.
Evolution from Worker to Galactic Protector
Long before inheriting the Matrix of Leadership, the commander began his journey as Orion Pax, a simple archivist who believed in social equality and peaceful institutional reform. This background heavily influences his strategic approach, as he constantly seeks diplomatic solutions and values the preservation of all sentient life above military dominance. His transformation into a warrior was born out of absolute necessity when ancient guard structures failed to protect innocent citizens from targeted guerrilla assaults.
When the planet's internal deity chose him to carry the ancient relic, his physical form was heavily upgraded to withstand the terrifying firepower of the enemy faction. This divine endorsement grants him the wisdom of past planetary rulers, allowing him to communicate directly with ancestral spirits during moments of severe tactical crisis. Despite these incredible gifts, he remains deeply connected to his humble origins, viewing himself as a guardian rather than a supreme ruler.
Tactical Gameplay Abilities and Combat Arsenal
On the battlefield, players experience a formidable powerhouse capable of shifting the momentum of major skirmishes through raw defensive durability and heavy ordnance. His primary weapon system includes an advanced Ion Blaster and a specialized Path Blaster that can tear through heavily armored infantry lines with relative ease. He also retains his signature transforming capability, allowing him to convert into a heavily armored truck to traverse hazardous debris fields quickly.
Beyond his individual loadout, his unique mental link with external defense modules allows him to coordinate large-scale artillery strikes across changing combat zones. He frequently leads from the very front of the vanguard, utilizing his massive frame to absorb incoming energy blasts for less durable allies. This selfless tactical approach is perfectly mirrored in the cooperative gameplay elements, encouraging players to prioritize team positioning over individual glory.

all stim locations jedi fallen order All Stim...
In Star Wars Jedi: Fallen Order, surviving intense lightsaber duels and treacherous imperial forces requires more than just mastering the Force. Increasing your healing capacity by hunting down extra medical supplies significantly changes your combat efficiency throughout the campaign. This definitive overview guides you through locating every hidden container to fully optimize Cal Kestis for the challenges ahead.
Essential Upgrades on Bogano
The quiet plains of Bogano hold crucial resources that players can secure early in their journey. Navigating into the Subterranean Refuge reveals a hidden alcove where BD-1 can slice open a yellow crate. Another valuable container is tucked away within the Landing Pad structure, requiring you to solve a brief physics puzzle utilizing the Force Push ability.
Hidden Canisters in Zeffo
The massive planet of Zeffo contains the highest concentration of medical upgrades scattered across its complex layout. Exploration enthusiasts should investigate the Derelict Hangar, where a careful jump sequence leads directly to an overlooked imperial chest. Additionally, traversing deep into the Ice Caves allows you to unlock a permanent upgrade situated right near a crucial meditation point.
Perilous Search on Kashyyyk and Dathomir
The dangerous jungles of Kashyyyk force players to explore off the beaten path to maximize their inventory capacity. Dropping down near the Origin Tree area reveals a secret pathway guarded by hostile local wildlife. Meanwhile, the dark environment of Dathomir rewards brave adventurers who scale the cliffs outside the Nightmare Ruins to find their final reward.

Where to Find Beegarde in Palworld and How...
In the vast world of Palworld, capturing specific creatures is essential for unlocking advanced survival resources. Among these valuable assets is Beegarde, a Grass-element Pal highly sought after for its ability to produce honey. Finding and successfully capturing this industrious creature requires navigating hazardous terrain and understanding its volatile defensive behaviors.
Best Wild Habitats for Beegarde
Players looking to locate Beegarde should direct their exploration toward the center regions of the archipelago. The most reliable spawning grounds are located throughout the Verdant Brook area, where groups frequently wander the forests. These creatures often travel in packs and can regularly be seen guarding their queen, Elizabee.
Another option for securing this Pal is visiting specific vendors scattered across the map. A Black Marketeer located at coordinates 144, -361 will occasionally feature Beegarde in their rotating inventory. If the Pal is not currently listed, reloading the area or waiting a short duration will refresh the stock.
When searching the wilderness, it is wise to maintain an elevated vantage point to spot their distinctive movements. Their bright coloring makes them visible from a distance against the lush green foliage of the temperate forests. Scanning the clearings carefully ensures you do not accidentally stumble into an aggressive swarm unprepared.
Overcoming the Self-Destruct Mechanic
The primary challenge when attempting to capture a Beegarde is its tendency to trigger a devastating explosion. When threatened or low on health, this creature will quickly initiate a self-destruct move called Bee Quiet. This dangerous ability will knock out the Pal instantly and prevent you from completing the capture process.
To mitigate this explosive threat, players must employ rapid crowd control techniques during combat. Utilizing weapons or Pals that inflict status effects like Stun, Freeze, or Shock can temporarily immobilize the creature. Striking the Pal with a melee weapon immediately after engaging can also disrupt its ability to start detonation.
If you see a bright glowing aura surrounding the creature, it means the detonation sequence has already begun. In these critical moments, throwing a sphere immediately is often the only way to interrupt the countdown. Alternatively, recalling your active Pal can save them from taking massive collateral damage from the blast.
Effective Catching Strategies and Pal Spheres
Preparation is key when venturing into the woods to secure this elusive Grass-element companion. Because they move in groups, players should bring high-durability armor and a versatile ranged weapon to manage multiple targets. Isolating a single target from the rest of the swarm makes the capturing attempt significantly safer.
When reducing the creature's health, ensure you are equipped with high-tier Pal Spheres for better odds. Giga or Hyper Spheres are strongly recommended to secure a swift capture before the target can react. Throwing the sphere from behind gives a back-bonus advantage, which drastically increases your success probability.
It is also beneficial to utilize Pals that possess elemental advantages during the engagement. Fire-element companions deal increased damage to Grass types, allowing you to lower their health bars efficiently. However, you must command your active companion to stop attacking early to prevent an accidental knockout.
Establishing a Honey Farm in the Ranch
Securing a Beegarde unlocks one of the most efficient automated resource systems available in the game. When assigned to a building like the Ranch, these hard-working Pals will automatically begin producing sustainable amounts of Honey. This resource is a critical ingredient for baking cakes, which are necessary for advanced Pal breeding mechanics.
Beyond farming, these creatures also provide helpful combat synergies if kept in an active party. Carrying multiple Beegardes in your team provides substantial attack and defense boosts to an allied Elizabee. This makes them excellent utility companions for players who enjoy utilizing themed squad compositions during challenging boss encounters.
Managing multiple working bees at your home base ensures a steady supply of culinary ingredients. Setting up a dedicated storage container near the ranch minimizes the transit time for your transporting units. This optimization keeps your base running smoothly while you continue exploring the outer reaches of the island.

How To Edit A PAK File Step By...
Many modern video games and software applications store their core assets inside compressed archive containers known as PAK files. Modders and tech enthusiasts frequently look to modify these packages to customize gameplay mechanics, swap textures, or update specific localized audio files. Understanding the proper workflow ensures that you can adjust the inner contents safely without causing application crashes or corrupting your software installation.
Identifying the PAK File Source
Before attempting to alter any archive, you must determine which engine or system originally generated the file. Different software tools utilize the same extension, meaning a container built for an Unreal Engine game requires entirely different extraction software than one built for an older title. Checking community documentation online will quickly reveal the exact file structure you are dealing with.
Extracting the Contents Safely
Once you have identified the format, you will need a dedicated extraction program to unpack the internal directories. Programs such as specialized game unpackers or standard command-line tools can successfully dump the internal data into an accessible folder on your computer. It is critical to copy the original archive to a secure backup directory before initiating this extraction process.
Modifying the Extracted Assets
With the files successfully extracted, you can browse through the local directories to locate the specific textures, scripts, or audio clips you wish to adjust. Use compatible editing suites to make your changes, ensuring that you maintain the exact original file names and formats. Modifying these components carefully prevents the underlying application engine from rejecting your custom data during runtime.
Repacking and Testing the Archive
The final stage requires you to compile your modified folder structure back into the specialized compressed format required by the application. Run the appropriate tool to compress the data, ensuring the new archive exactly matches the naming convention expected by the software. Place the fresh archive back into the game directory and launch the application to verify that your customized edits function flawlessly.

Is No Mans Sky Good And Is It...
No Man's Sky has earned its reputation as one of the most remarkable turnaround stories in modern interactive entertainment. What began as a highly controversial launch in 2016 has transformed through a decade of massive free content updates into a sprawling, deeply immersive space exploration simulator. For gamers wondering if the universe is worth visiting today, the short answer is that the game has never been in a better or more complete state.
A History of Constant Evolution
The development team at Hello Games chose to answer early criticism with tireless dedication rather than walking away from their ambitious project. Over forty major updates have fundamentally changed how players interact with the infinite procedural galaxy. These expansions added comprehensive multiplayer frameworks, complex base-building mechanics, and fully realizable space fleets that did not exist in the initial release.
Recent overhauls like the Worlds updates have introduced staggering visual improvements, altering planetary generation with realistic water physics, volumetric clouds, and shifting weather systems. The universe now feels truly alive, populated by diverse flora and fauna that react naturally to their environments. This persistent dedication ensures that returning veterans and new players alike find fresh surprises waiting on every single horizon.
The Modern Space Exploration Loop
At its core, the current experience masterfully balances survival mechanics with creative freedom across billions of star systems. Players spend their time charting undiscovered planets, gathering rare elements, and upgrading their personal starships or exosuits. The progression loop feels rewarding, offering tangible upgrades that allow deeper travel into hostile stellar regions.
Beyond standard survival, players can engage in intricate deep-space combat, manage planetary settlements, or follow an engaging narrative path that explores the philosophical nature of reality. The inclusion of community expeditions provides timed challenges that bring the player base together for unique seasonal rewards. These structured activities provide excellent direction for those who might otherwise feel overwhelmed by the sheer scale of an open galaxy.
Who Will Enjoy the Game Today
This title is an absolute masterpiece for individuals who prioritize atmospheric exploration, peaceful resource management, and sandbox creativity. The low-pressure environment allows you to progress entirely at your own pace without forcing frantic combat scenarios. It acts as an incredible digital escape, offering beautiful vistas and a relaxing gameplay loop that few other modern titles can replicate.
However, players who require tightly scripted stories or highly competitive multiplayer action might still find the open-ended nature a bit aimless. The game relies heavily on self-driven goals, requiring you to decide whether to build a massive underwater fortress or hunt down exotic starships. If you enjoy setting your own path in a gorgeous cosmic playground, the current version will easily provide hundreds of hours of high-quality entertainment.

PlayStation 4 Games for Kids Family Friendly Titles...
Finding the perfect video games for younger audiences involves balancing pure entertainment with age-appropriate themes and engaging mechanics. The PlayStation 4 boasts an expansive library of titles that cater beautifully to families, offering everything from collaborative puzzles to creative sandboxes. By choosing software that encourages skill development and shared experiences, parents can transform screen time into a constructive and joyful household activity.
Creative Sandboxes and Building Innovation
Virtual building environments provide an exceptional outlet for children to express their imaginations without real-world constraints. These interactive titles allow players to manipulate colorful blocks, construct complex architectural wonders, and design unique landscapes from scratch. The lack of rigid rules encourages experimental thinking and problem-solving, which helps kids develop spatial awareness at their own comfortable pace.
Furthermore, these sandbox digital worlds often feature passive gameplay modes that eliminate combat or high-stakes pressure entirely. This structural freedom ensures that even the youngest gamers can navigate the digital space confidently without feeling overwhelmed by sudden defeat. It remains an ideal choice for parents looking to foster computational thinking and artistic expression through modern console gaming.
Cooperative Adventures for Shared Bonding
Collaborative multiplayer gaming offers an excellent framework for teaching children the value of teamwork, communication, and mutual support. Many family-friendly adventures require players to synchronize their movements, share crucial items, and solve environmental puzzles together to progress through the story. This shared dynamic naturally reduces the frustration of difficult levels since a parent or older sibling can easily assist during challenging segments.
Engaging in these shared digital journeys also helps younger players learn how to handle minor setbacks constructively within a safe environment. Instead of competing against one another, family members work toward a unified goal, celebrating collective victories on the exact same sofa. This cooperative design reinforces positive social interaction and strengthens familial communication patterns through interactive entertainment.
Whimsical Platformers and Cognitive Growth
Brightly colored platforming games serve as a foundational genre for developing crucial motor skills and rapid hand-eye coordination in growing children. Navigating charming characters through imaginative vertical obstacle courses requires precise timing, spatial estimation, and quick reflexes. The gentle learning curves found in modern titles ensure that players are steadily challenged without experiencing excessive punishment for simple mistakes.
Beyond physical dexterity, these whimsical adventures frequently incorporate light memory puzzles and pattern recognition mechanics into their core gameplay loops. Kids must observe enemy movements, memorize maze layouts, and determine the optimal route to reach the next checkpoint safely. This clever combination of physical action and mental engagement keeps young minds active and fully entertained during play sessions.
Engaging Narrative Journeys and Storytelling
Interactive stories provide a wonderful alternative to passive cartoon viewing, allowing children to directly influence the outcome of gentle animated tales. These titles often feature high-quality voice acting, expressive character designs, and accessible choices that dictate how individual scenes unfold over time. By stepping into the shoes of relatable heroes, young audiences develop deeper empathy and a stronger appreciation for complex narrative structures.
Many of these story-driven titles are deliberately designed with reading accessibility in mind, incorporating clear subtitles and prominent visual cues to guide early learners. Parents can actively read along with the on-screen text, turning a standard afternoon gaming session into an interactive literacy exercise. This thoughtful approach highlights how modern home consoles can serve as versatile tools for both emotional growth and intellectual enrichment.

Saint of the Slums DD2 Quest Guide and...
Navigating the impoverished corners of Vernworth reveals complex societal struggles that extend far beyond the royal court. In the heart of the slums, players will encounter a compelling narrative involving a local medical facility known as the Gracious Hand. This comprehensive guide details the intricate steps required to uncover the dark secrets hidden within this charitable institution and successfully complete the quest line.
Starting the Investigation at the Gracious Hand
To begin this journey, you must travel to the slums of Vernworth and locate the prominent chapel building. Outside the facility, you will meet Lady Elena, an abbess who appears dedicated to treating the city's poorest citizens. She will request your assistance in gathering specific materials to help create treatments for the growing number of sick patients.
Providing her with three pieces of Miasmite will successfully trigger the next phase of the storyline. This unique resource can be obtained by defeating phantom enemies that appear in the wilderness during the night hours. Delivering these items grants you access to the inner wards, allowing you to observe the facility's daily operations closely.
Gathering Crucial Evidence and Interrogating Witnesses
Once inside the chapel, you will encounter a bedridden beastren patient named Lubomir who expresses deep suspicion about his treatment. He will quietly ask you to look into the unusual medical practices of the abbess away from watchful eyes. This conversation shifts your objective toward gathering physical proof to confirm his unsettling theories.
You will need to visit the local tavern during the evening to speak with other residents who have witnessed the facility's operations. The citizens will provide key details regarding recent disappearances and strange nightly meetings. These conversations reveal that the answers you seek lie deep within the basement quarters of the chapel itself.
Uncovering Secrets in the Subterranean Sickroom
Gaining access to the lower levels requires patience, as you must wait until the late hours when the staff shifts change. Sneaking past the entryways allows you to explore the hidden backrooms where unauthorized medicine is being stored. Here, you will discover an unlabeled medicine bottle alongside a suspicious clinical logbook.
Taking these items to a certified medical professional in the Common Quarter helps verify the true nature of the compounds. The local doctor will analyze the ingredients and confirm that the substance is actually worsening the patients' conditions over time. Armed with this knowledge, you have sufficient proof to put an end to the malicious operation.
Apprehending the Abbess and Completing the Objectives
With the medical analysis complete, you must return to the Gracious Hand to confront the leadership before more harm occurs. Locating Elena during her nightly rounds allows you to initiate the final tackle sequence. Pressing the designated grab command will safely secure the suspect and automatically alert the royal guards.
The authorities will arrive swiftly to transport the corrupt healer directly to the city dungeons for formal questioning. Speaking with the remaining patients afterward confirms that the facility can now begin true recovery efforts under honest supervision. Successfully resolving this case ensures safety for the vulnerable residents and rewards your party with substantial experience and gold.

Where Are The Trolls In Hogwarts Legacy
The vast open world of Hogwarts Legacy is filled with numerous magical creatures, hidden secrets, and formidable foes waiting to be discovered. Among the most dangerous adversaries players will encounter during their journey are trolls, massive beasts that present a significant combat challenge. Finding these creatures is essential for completing certain assignments, gathering valuable potion ingredients like troll bogeys, and achieving full exploration mastery.
Searching for Troll Lairs on the World Map
The most efficient way to locate these powerful enemies is by tracking specific regions marked on your map. Troll Lairs are scattered across the Scottish Highlands and are indicated by a distinct cave-like icon. Exploring areas such as the Feldcroft Region and the Forbidden Forest will yield multiple locations where these monsters live.
When hunting for these beasts, players should pay close attention to the northern and southern edges of the map. The mountainous terrain near coastal areas often houses hidden lairs that are easy to miss on a casual flight. Flying high on a broomstick allows you to scan the environment quickly for active combat zones.
Key Regions for Finding Trolls
Feldcroft remains one of the most reliable territories for players looking to farm these monsters for resources. There are at least two prominent lairs located near the small hamlets in this western zone. Defeating them here is excellent practice for handling their aggressive, unblockable club swings.
Another excellent hunting ground is the southern portion of the map, specifically around the Marunweem Lake and Clagmar Coast regions. These high-level zones feature tougher variants of the beasts that guard valuable treasure chests. Preparing proper defensive spells before entering these areas ensures your survival against their massive health pools.
Defeating Trolls for Valuable Resources
Successfully conquering a troll encounter rewards players with valuable Troll Bogeys, which are necessary for brewing critical combat potions. Professor Onai will also require you to collect these materials to complete her special assignment and unlock the Descendo spell. Learning how to redirect their own rocks back at them with Ancient Magic throw makes the battles significantly shorter.
Stunning the creatures by casting Flipendo right after they slam their club into the ground is another elite tactical choice. This leaves them vulnerable to heavy damage combos from your standard offensive spells. Managing your distance during the fight will keep you safe from their sudden charging attacks.

Best Team Composition in Persona 5 Royal
Mastering turn-based combat in Persona 5 Royal requires players to think beyond individual character strengths and focus on synergetic party lineups. While Joker remains the versatile anchor of the Phantom Thieves due to his Wild Card ability, selecting the right trio of active allies can turn grueling boss fights into trivial encounters. Balancing heavy physical damage, supportive elemental magic, and reliable defensive buffs is the key to conquering the game's toughest challenges.
The All Around Powerhouse Lineup
For general exploration and standard boss encounters, a balanced approach utilizing Ryuji, Ann, and Makoto offers unmatched versatility. Ryuji functions as the primary physical damage dealer, eventually unlocking critical party-wide physical attack buffs that amplify your overall offensive output. Ann complements this strategy by dealing massive fire magic damage and applying valuable offensive debuffs to neutralize high-threat enemies.
Rounding out this reliable combination is Makoto, who serves as the ultimate utility support member for the team. She provides consistent party-wide healing capabilities alongside defensive defense buffs that keep your team safe during unpredictable enemy turns. This specific distribution of combat responsibilities ensures that you can handle elemental weaknesses while maintaining high survivability throughout complex dungeons.
The Critical and Technical Specialists
Players looking to exploit advanced combat mechanics often substitute traditional setups for a team consisting of Yusuke, Haru, and Morgana. Yusuke excels at boosting overall team evasion rates while unleashing multi-target physical attacks that consistently clear waves of basic shadows. His high agility pairing allows your team to move first and dictate the initial pacing of unexpected combat encounters.
Haru adds an extra layer of tactical complexity by utilizing specialized gun attributes and psychic spells to trigger devastating technical damage. When combined with Morgana's high critical hit rate capabilities, this team archetype excels at knocking down opponents without relying entirely on standard elemental weaknesses. It represents an exceptional alternative configuration for players who enjoy capitalizing on status ailments and positional advantages.
Late Game Adaptability and End Game Strategy
As you approach the definitive third semester content, specialized characters like Akechi and Sumire introduce powerful new mechanics to your tactical options. Integrating these late-game allies into your party allows you to bypass standard defensive configurations using rare damage types and exceptionally high critical hit modifiers. Experimenting with these final team iterations provides fresh mechanical solutions for the ultimate endgame bosses.
Ultimately, the definitive choice of party members should shift dynamically depending on the unique behavioral patterns of the specific boss you are currently facing. Because Persona 5 Royal allows you to cycle active participants during active combat phases, understanding individual role synergy remains far more valuable than sticking to a single fixed configuration. Swapping members strategically ensures your phantom thieves remain completely prepared for any tactical obstacle.

Dreamlight Valley Acts of Care Quest Guide
Disney Dreamlight Valley continues to offer meaningful storylines that allow players to build deep connections with various magical residents. Among these storyline missions, the Acts of Care quest focuses on helping The Forgotten reconnect with the village through thoughtful gestures. Completing this quest strengthens your relationship with The Forgotten while restoring harmony across the valley.
Prerequisites and Unlocking the Quest
Before you can begin this mission, you must complete the prerequisite quest titled The Magic in Everything. After finishing that quest, a real-time waiting period of one full week is required before the new storyline unlocks. Once the time has passed, check your quest log to begin assisting your dark counterpart.
If you have trouble finding your quest partner, try checking inside the Dark Castle or near the main Plaza well. Transitioning in and out of portals often resets character locations if they do not immediately appear on your map. Once located, speak with them to discuss making amends with the villagers.
Gathering Flowers for Mickey Mouse
The first major objective requires collecting specific floral species scattered throughout different biomes in the valley. You need to gather three White & Pink Falling Penstemons, two Black Passion Lilies, and two Red Daisies. Taking time to search the Plaza, Frosted Heights, and Peaceful Meadow will yield all necessary flowers.
After delivering the floral arrangement to The Forgotten, follow them as they present the gift to Mickey Mouse in the village. Encouraging words during conversation choices will help build their confidence throughout this social exchange. Watching this interaction successfully completes the first stage of the quest line.
Preparing Ingredients for Bouillabaisse
The next phase involves preparing a fresh meal to share with Goofy to make up for past misunderstandings. You must harvest a freshly grown Tomato from your garden crops and catch a fresh Shrimp from Dazzle Beach fishing spots. Using Miracle Growth Elixir on planted seeds can speed up the harvesting phase significantly.
In addition to the main items, gather one extra vegetable from your farm and two additional seafood items from any water body. Head to a cooking station to combine these ingredients into a fresh Bouillabaisse dish. Having these items freshly sourced ensures the meal meets all quest requirements.
Completing the Quest and Claiming Rewards
Bring the prepared Bouillabaisse directly to Goofy to trigger a heart-warming dialogue about friendship and forgiveness. Goofy gratefully accepts the meal and invites everyone over to enjoy dessert together. This heartwarming gesture marks a major step forward in integrating The Forgotten back into community life.
Return to your companion one last time to finish the dialogue and conclude the mission. Completing this storyline rewards you with increased friendship progression and unlocks additional narrative opportunities. Taking time to nurture these social bonds remains one of the most rewarding aspects of the game.

NBA Game Time on PS Vita Features and...
Basketball enthusiasts looking to track their favorite teams on the go can now leverage Sony's handheld console for real-time sports updates. The launch of the NBA Game Time application on the PS Vita brings comprehensive basketball coverage directly to the portable gaming landscape. This expansion ensures that fans never miss critical court action while away from their primary home entertainment setups.
Key Content and Navigation Features
The application offers a fully optimized user interface designed specifically to accommodate the handheld console's vibrant multi-touch display screen. Users gain instant access to extensive video highlights, player box scores, live game statistics, and upcoming league schedules. Navigating through different team profiles or player stat sheets feels fluid and highly responsive compared to traditional mobile web browsing.
For dedicated followers who need deep tactical insights, the software bundles in-depth roster parameters and historical team information. The developers completely redesigned the experience to ensure fans can check complex shot charts and play-by-play data breakdowns dynamically during live broadcasts. It transforms the portable system into a comprehensive secondary screen companion for regular-season tracking.
NBA League Pass Integration
The true value of this utility unlocks for individuals holding an active premium subscription to the league's official broadcasting service. Authenticated users can stream live out-of-market games directly to their handheld device over standard wireless internet connections. This functionality provides an incredibly convenient way to view entire matchups without being anchored to a television monitor.
In addition to standard live feeds, the system accommodates full game replays and condensed recaps for those trying to catch up on midnight broadcasts. Subscribers can switch between home and away commentary audio tracks to customize their preferred viewing perspective. This seamless synchronization bridges the gap between conventional mobile streaming apps and dedicated gaming hardware platforms.
Regional Availability and Requirements
The initial release of the application primarily targets console users residing within the United States market. While the digital download remains free on the PlayStation Store frontend, standard blackout restrictions still apply to local regional broadcasts. Sony and the league are actively evaluating expansion plans to deploy the service to international territories in subsequent updates.
To guarantee a smooth playback experience, a stable high-speed Wi-Fi connection is highly recommended when streaming high-definition video packages. Users should also ensure their system firmware is fully updated to prevent compatibility conflicts during the authentication phase. Managing your sports content remotely has never been more straightforward for the modern handheld gaming community.

How Many Games Are On PlayStation Plus And...
Sony interactive subscription services have transformed significantly since the introduction of the multi-tiered membership model. PlayStation Plus currently provides players with a vast selection of experiences that range from modern blockbusters to nostalgic retrospectives. Navigating this vast catalog requires a clear understanding of what each specific membership level delivers to your gaming dashboard.
The Core Structure of Modern Subscription Tiers
The service is officially divided into three separate membership tiers designed for different styles of gaming. The standard Essential tier functions as the foundational package, granting access to online multiplayer modes and a few monthly downloadable titles. Upgrading to the mid-tier option unlocks a massive rotation of modern titles, making it an ideal choice for active players.
For players who want the complete digital archive, the highest premium tier provides maximum utility. This top-level option adds historic console content alongside advanced features like cloud streaming and limited game trials. Selecting the ideal plan requires balancing your monthly budget against how many titles you intend to play each year.
Estimating the Total Game Volume Across the Catalog
The total library size varies depending on your region and the specific day you browse the digital storefront. Across the entire ecosystem, the platform boasts well over seven hundred distinct titles spread throughout the various tier catalogs. This impressive total continues to shift as new software arrives and older agreements expire each month.
Subscribers using the Extra and Premium levels gain access to a massive library containing roughly four hundred modern PS4 and PS5 titles. The highest tier expands this collection significantly by incorporating hundreds of retro adventures from classic hardware eras. This sheer volume ensures that community members always have a fresh virtual world to explore.
Breaking Down the Contents of Each Service Tier
The Essential level focuses primarily on fundamental community features rather than maintaining a permanent software archive. Members receive three promotional software downloads every month, which remain accessible as long as the subscription stays active. This basic package also ensures you can join friends in competitive online lobbies and secure your progress via cloud saves.
Stepping up to the Extra tier introduces the extensive Game Catalog, which represents the core value proposition for most modern console owners. This library features massive open-world titles, indie sensations, and major first-party exclusives that you can download directly to your hardware storage. It provides a straightforward path to experiencing major releases without purchasing individual digital licenses.
Exploring the Premium and Deluxe Classics Archive
The premium membership level caters heavily to long-time fans who want to relive the early generations of home console history. This exclusive tier introduces the Classics Catalog, which adds a curated selection of titles originally released for the original PlayStation, PS2, and PSP. Many of these retro titles have been enhanced with modern features like uprendering, quick saving, and trophy support.
Furthermore, this top tier enables cloud streaming capabilities, allowing users to jump into demanding software setups instantly without waiting for long downloads. It also provides time-limited game trials for major new releases, giving you a chance to test out fresh software before making a financial commitment. If you want to check your current plan or explore potential upgrades, you can review your details on the official PlayStation Plus dashboard via your console settings.

God Of War Ragnarok Midgard Complete Exploration Guide
Exploring Midgard in God of War Ragnarok offers a freezing yet deeply rewarding journey through Norse lore. The realm has changed dramatically since the previous game, with the Fimbulwinter ice completely altering the landscape and uncovering new mysteries. Navigating this vast snowy desert requires players to pay close attention to environmental cues and hidden pathways.
Navigating the Frozen Lake of Nine
The central hub of Midgard remains the Lake of Nine, which is now completely frozen over and traversable by a wolf-driven sled. As you slide across the icy plains, keep an eye out for prominent ruins and towering structures that point toward hidden optional areas. Exploring these landmarks systematically will reveal several relic locations and crucial crafting materials needed for end-game upgrades.
Many distinct points of interest are scattered around the icy expanse, including the remains of Tyr's Temple and various raider outposts. Taking the time to clear these outposts yields valuable rewards and provides essential lore context regarding the state of the realm. A thorough sweeps across the frozen surface ensures that no minor collectibles or treasure maps are overlooked.
Unlocking Secrets Within the Derelict Outpost
The Derelict Outpost stands as a major secondary area in Midgard that requires clever use of Kratos's signature weapons to navigate. Players must manipulate dangling cranes and grappling points to cross deep chasms hidden within the mountain structures. Solving these spatial environmental puzzles rewards patient adventurers with legendary chests containing unique runic attacks.
Additionally, this area hosts specific artifacts and Odin's ravens that are essential for achieving one hundred percent completion in the realm. It is best to approach this location with fully upgraded equipment to comfortably manage the localized combat encounters. Taking your time here guarantees you gather the necessary resources to strengthen your overall combat capabilities.
Conquering The Eternal Campfire Side Quest
The Eternal Campfire serves as a highly atmospheric sub-zone tucked away in the northern reaches of the Midgardian map. Finding this location initiates a poignant favor that tasks players with retrieving specific recipe ingredients scattered across multiple realms. Completing this questline provides deep narrative insights into past travellers who journeyed through the Norse lands.
Following the quest markers will lead you directly to unique points of interest that are easy to miss during a standard story playthrough. For players tracking their completion metrics, finishing this favor is highly recommended as it yields a highly powerful amulet enchantment. Immersing yourself in this side activity greatly enriches the overall storytelling experience of the game.
Uncovering Hidden Relics and Tombs
Deep within the eastern cliffs of Midgard lies King Hrolf's berserker gravestone, which represents one of the most demanding combat challenges in the entire game. Before challenging this optional boss, players must systematically locate various lore markers that hint at the ancient king's history. Preparing proper runic setups and armor sets is critical before initiating this intense endgame encounter.
Beyond the tombs, hidden alcoves contain rare realm tears and legendary treasure caches buried beneath the deep snowbanks. Exploring these dangerous spots requires exceptional situational awareness and readiness for sudden high-level enemy ambushes. Unearthing these final hidden secrets brings complete mastery over the wintery landscapes of Midgard.

Is Baldurs Gate 3 Multiplayer And How Co...
Exploring the vast world of Faerun in Baldur's Gate 3 offers an incredible narrative experience that can be enjoyed entirely with friends. Larian Studios built this massive role-playing game from the ground up to support both isolated journeys and collaborative party dynamics. Understanding how these connected systems function will allow your team to seamlessly navigate the complex story campaigns together.
The Core Multiplayer Setup
Baldur's Gate 3 fully supports cooperative play for up to four players online, as well as a local split-screen mode for two players on compatible systems. When starting a fresh campaign, the host can invite friends directly into the character creation lobby to build custom heroes from scratch. Alternatively, players can join an active game session at any time and take control of an existing companion or create a new custom character who joins the party camp.
The saving mechanism rests entirely with the host player who initially started the adventure session. This means the party can only progress the specific campaign file when the designated world owner is actively running the game lobby. Guest players can save their customized character configurations, but the actual story milestones are tied directly to the main save file.
How Co Op Mechanics Function in Exploration
Once inside the game world, players are granted an immense amount of freedom to explore the environments independently of one another. The party is not tethered to the same screen, meaning one person can manage inventory at a village vendor while another triggers a distant trap. This independent movement structure enables strategic scouting and efficient resource gathering across large areas.
When conversations with non-player characters occur, the individual who initiates the dialogue takes the primary lead in making pivotal narrative choices. Other nearby players can listen in on the active conversation stream to suggest choices or vote on specific response paths in real-time. This interactive feature transforms crucial story turning points into a democratic group discussion rather than a solitary decision.
Turn Based Combat Cooperation
Combat in cooperative mode retains the classic tactical system but adapts smoothly to the presence of multiple human minds. When multiple party members share consecutive initiative slots, they can execute their actions simultaneously in any order they choose. This simultaneous turn mechanic allows teams to plan devastating elemental combinations and flanking maneuvers without waiting for artificial turn timers.
If a player triggers an unexpected combat sequence in a hidden cave, the remaining party members who are far away will not be automatically pulled into the fight. The distant players can continue exploring safely or sprint toward the active battle arena to provide crucial reinforcements. Arriving late to a battle allows stealthy characters to position themselves for a powerful surprise attack on unsuspecting enemies.
Managing Companion Relationships and Quests
Dividing the maximum four-person party slot limit requires careful coordination if you want to experience origin character storylines. Every human player takes up a permanent slot in the active party array, which limits the number of computer-controlled companions you can bring along. Teams will need to swap members at the camp site periodically to advance specific companion storylines.
Romance options and personal approvals are calculated individually for each human player based on their direct interactions throughout the campaign. This individualized approval system means a companion might deeply respect one player while actively disliking another member of the same adventuring group. Balancing these varied relationships adds a unique layer of political tension and storytelling depth to the shared campaign journey.

With Great Power Disney Dreamlight Valley Quest Complete...
Progressing through the magical biomes of Disney Dreamlight Valley requires completing fundamental story missions that expand the kingdom borders. One crucial early assignment given by Merlin is the prominent narrative storyline involving the mystical cave hidden beneath Dazzle Beach. Successfully traversing this ancient cavern requires players to solve a series of environmental riddle blockades to rescue Ursula and secure the Valley Orb.
Unlocking Dazzle Beach and Finding the Cursed Cave
Before you can begin this magical underground exploration, you must gather enough Dreamlight to clear away the giant Night Thorns blocking the path to the beach. Once you gain access to the sandy shoreline, Merlin will guide you toward a dark coastal cavern located on the eastern side of the biome. Investigating this eerie area leads to your initial interaction with Ursula, who provides a specialized crystal key needed to unlock the main ruins.
Take the glowing crystal key provided by the sea witch and locate the mechanical pedestal hidden further down the shore. Inserting the key into the structure will cause the ancient stone entrance to rise from the ground, granting access to the depths. Stepping inside initiates the puzzle phase where your critical thinking and gathering skills will be thoroughly tested.
Solving the Three Magic Gate Riddle Trials
The first barrier you encounter inside the subterranean facility consists of three stone statues holding their hands out. To proceed past this door, you must match the colored gems found across the valley with the corresponding status frames. Placing a red garnet, a blue aquamarine, and a green peridot into their proper slots will drop the energy field automatically.
Advancing past the first obstacle brings you to a agricultural challenge that tests your farming capabilities. The second barrier requires you to plant and fully grow three specific crops in the soil plots right in front of the locked gateway. You must source and plant carrot seeds, wheat seeds, and tomato seeds, then water them until they reach complete maturity to open the path.
The final puzzle gate asks you to interact with a cooking station located deep within the lowest level of the ruins. You must gather the three crops you just harvested from the previous room and combine them into a single dish. Cooking the fresh ingredients together yields a delicious vegetarian entrée that must be consumed to lower the ultimate defensive blockade.
Restoring the Beach Pillar and Completing the Storyline
After breaking through the final barrier, use your royal fishing rod to retrieve the glowing Orb of Power from the deep pool below. Exit the mystical cavern and navigate back up the beach until you locate the corrupted stone pillar near the shoreline. Placing the purified sphere directly into the socket will immediately cleanse the surrounding coastal biome of dark magic.
Return to the mystical cave once more to speak with Ursula, who will share valuable information regarding the nature of the Forgetting. Finally, talk to Merlin outside the ruins to finish the assignment and claim your experience point rewards. Completing this major milestone prepares you for advanced character storylines across the changing valley landscape.

P3 Reload Yukari Social Link Complete Guide
Building a deep connection with Yukari Takeba is one of the most rewarding aspects of the Persona 3 Reload campaign. As the representative of the Lovers Arcana, her storyline offers critical character growth alongside massive advantages for your combat party. Players looking to unlock her ultimate persona must carefully navigate her strict scheduling parameters and specific dialogue choices throughout the school term.
How to Unlock the Lovers Arcana
Initiating this relationship requires substantial preparation compared to early game companions. Players cannot begin spending casual time with her until July 25th at the earliest, following the eventful group trip to Yakushima. Furthermore, the protagonist must achieve Level 6 Charismatic status to even trigger her initial conversation in the classroom.
Missing the early windows will not permanently lock you out of her storyline. She remains available on Monday, Wednesday, Thursday, and Saturday afternoons during normal school weeks. However, maximizing her ranks efficiently requires balancing your evening activities to ensure your social stats are prepared well in advance.
Optimizing Rank Choices and Bonuses
Progressing through the ten distinct levels demands careful attention to the dialogue prompts presented during your classroom and rooftop hangouts. Bringing a matching Lovers Arcana persona during these interactions provides a significant boost to your hidden relationship points. Selecting supportive, empathetic answers yields the highest progression values and minimizes the days spent on non-ranking interactions.
Achieving higher milestones directly elevates Yukari's operational capabilities when exploring Tartarus. Her specialized healing skills receive reduced costs, allowing your party to endure long dungeon expeditions much easier. Maximizing this bond grants the unique item required to fuse the exceptionally powerful Kohryu persona in the Velvet Room.
Navigating the Romance and Platonic Paths
Persona 3 Reload introduces more distinct operational boundaries when approaching the final tiers of female companion storylines. As you approach Rank 9, the game will explicitly warn you about the turning point in your relationship dynamic. Players can choose to pursue a dedicated romantic partnership or maintain a strong platonic friendship based on their responses.
Choosing the platonic route does not diminish the mechanical rewards or block the final fusion unlock. It allows players to experience her full narrative arc without affecting potential relationships with other characters. Carefully evaluating your choices during these critical late-game events ensures your story unfolds exactly as you prefer.

Elden Ring Dark Moon Greatsword Build Stats Talismans...
The Dark Moon Greatsword remains one of the most iconic and powerful legendary armaments available to players in Elden Ring. Centered heavily around intelligence scaling, this weapon delivers incredible magic damage alongside reliable frostbite buildup. Mastering this specific build requires a precise balance of attributes, specialized talismans, and complementary sorceries to unlock its true endgame potential.
Optimal Attribute Distribution and Stats
To maximize the scaling efficiency of this legendary blade, players must prioritize their intelligence attribute above all others. Reaching at least sixty to eighty intelligence ensures that both the standard physical-magic swings and the unique projectile waves deal massive damage. You will also need minimum requirements of sixteen strength and eleven dexterity just to wield the sword properly.
Aside from offensive stats, allocating points into vigor and mind is essential for survival and skill maintenance. Having forty to sixty vigor provides a comfortable health pool to withstand aggressive boss combos in the Lands Between. A modest investment in mind allows you to frequently activate the weapon buff without constantly draining your focus points.
Essential Talismans for Maximum Damage
Selecting the right accessories can drastically elevate the damage output of the weapon's unique skill, the Moonlight Greatsword. The Godfrey Icon is highly recommended because it directly boosts the power of charged heavy attacks and projectiles. Additionally, the Shard of Alexander provides a significant percentage increase to the overall attack power of the skill itself.
For players looking to maximize their magical potential, the Magic Scorpion Charm offers a welcome boost to all magic-based damage. However, it does increase your physical damage vulnerability, so pairing it with protective armor is highly advised. The Ritual Sword Talisman can also be utilized to increase your total offensive power whenever your health remains completely full.
Recommended Spells and Sorceries
A proper magic build should always feature a selection of sorceries that complement the close-to-mid-range playstyle of the greatsword. Casting Terra Magica creates a localized zone on the ground that amplifies all magic damage dealt while standing inside it. This boundary works perfectly when you plan to stay stationary and unleash consecutive charged moonlight projectiles at a distance.
Integrating utility sorceries like Ranni's Dark Moon can further debuff your targets by lowering their magic damage negation capabilities. Following up this frost-inducing spell with the sword's unique projectile waves creates a devastating offensive sequence against major bosses. You can also equip standard projectiles like Night Comet to safely pull enemies or deal quick damage when space is limited.
Flask Configuration and Combat Strategy
Configuring your Flask of Wondrous Physick is the final step in perfecting this powerful intelligence setup. Combining the Magic-Shrouding Cracked Tear with the Stonebarbed Cracked Tear provides a perfect blend of extra magic damage and increased stance-breaking potential. This allows the blade to easily stagger massive foes while continuously applying heavy frostbite status effects.
During active combat encounters, your primary objective should be maintaining the active weapon buff at all times. Once the blade is bathed in moonlight, focus on finding safe windows to execute fully charged heavy attacks. This strategy allows you to maintain a safe distance while letting the magical waves chip away at enemy health pools seamlessly.

Dreamlight Valley The Chronicles Of The Ancients Complete...
Navigating the rich magical narrative of Disney Dreamlight Valley involves deepening your relationships with iconic characters through intricate multi-stage storylines. Reaching the peak of friendship with Belle unlocks her final level ten quest, a journey that reveals lost lore hidden deep within the valley's history. Fulfilling these historical tasks requires steady patience, careful biome exploration, and a solid understanding of how ancient relics interact with your royal tools.
Initiating the Ancient Investigation with Belle
To begin this late-game storyline, you must first maximize your friendship level with Belle to level ten and unlock the Beast's castle. Once these milestones are reached, speaking with Belle will trigger the search for a forgotten record containing secrets of the valley's earliest rulers. She will guide you toward a hidden relic tucked away in the mystical archives, setting off a grand scavenger hunt across multiple biomes.
Your primary objective starts inside the Dreamlight Library, where careful investigation reveals a mysterious glowing scroll container. Bringing this item back to Belle allows her to translate the ancient language, pointing toward long-lost mechanisms buried beneath the earth. This crucial discovery sets the foundation for tracking down the legendary chronicle pieces that rest in secret chambers.
Gathering the Lost Chronicle Fragments
Uncovering the scattered remains of the ancient manuscript requires players to journey to specific environmental coordinates across the map. You will need to travel to the Glade of Trust and search near the waterfall to uncover the first embedded fragment using your royal shovel. Another essential piece lies buried deep within the sands of Dazzle Beach close to the mystical cave entrance.
The final fragment demands a quick excursion into the frosted heights, forcing players to navigate narrow snowy ledges near the regional riverbanks. Once all distinct components are safely in your inventory, you must return to Belle to piece together the fractured history. She will note that the ancient record requires a unique binding agent to fully restore its magical properties.
Crafting the Mystical Book Stand
Restoring the grand manuscript requires assembling a specialized pedestal that can harness and preserve the lingering magical energy. Players must gather fifteen pieces of hardwood, five gold ingots, and a collection of shimmering dream shards from daily cleaning routines. Bringing these premium materials to a nearby crafting station allows you to construct the beautiful restored chronicle holder.
After successfully assembling the structural frame, you will need to place the completed furniture item inside the Beast's grand library room. Interacting with the newly placed stand securely anchors the translated document, triggering a vibrant magical display that updates your overall quest log. This action allows Belle to permanently study the ancient texts and share her historical insights with the community.
Completing the Quest and Claiming Rewards
The final phase of this extensive friendship milestone involves listening to Belle summarize her findings regarding the valley's original protectors. This touching interaction concludes the narrative arc, cementing your strong bond with the classic princess and bringing harmony back to her household. The resolution also grants players substantial experience points alongside exclusive decorative rewards to enhance their personal valley layouts.
Successfully finishing this task rewards you with Belle's signature level ten item, a beautiful ball gown that highlights your ultimate friendship achievement. This gorgeous cosmetic piece can be accessed anytime through the wardrobe menu, allowing you to showcase your dedication to the magical community. Taking the time to clear these late-game objectives remains essential for players seeking total narrative completion.

How To Get Free Ps5 Games Legit Ways...
Building a robust library for the PlayStation 5 does not always require a massive financial investment. Sony and various publishers offer several legitimate avenues that allow enthusiasts to access top-tier software completely free of charge. By understanding where to look within the ecosystem, you can consistently enjoy new adventures without spending a dime.
Leveraging the PlayStation Plus Essential Monthly Lineup
The most reliable method to acquire quality software without direct costs is through the monthly perks provided by active membership tiers. Every single month, Sony refreshes its lineup to provide users with permanent digital downloads as long as the subscription remains active. These offerings often include major blockbusters alongside critically acclaimed indie hits that quickly build up your permanent collection.
To ensure you never miss out, it is important to claim these monthly additions immediately through the console interface or mobile application even if you do not plan to install them right away. Once added to your account registry, these titles remain accessible whenever your subscription status is current. This baseline tier effectively guarantees a steady stream of premium gameplay throughout the calendar year.
Exploring High-Quality Free to Play Experiences
The modern landscape features an extensive catalog of dedicated experiences that cost absolutely nothing to download or play. Competitive multiplayer phenomena, sweeping open-world role-playing campaigns, and cooperative survival adventures dominate the PlayStation Store charts without demanding upfront payments. These titles leverage advanced hardware to deliver stunning visual fidelity and highly responsive frame rates.
Many players utilize these expansive experiences as their primary source of entertainment due to consistent seasonal content injections. Because they do not require a separate online subscription for multiplayer access, they represent the most accessible baseline for budget-conscious gamers. Exploring this vast section reveals hours of competitive action that rivals standard premium releases.
Maximizing Rewards and Digital Loyalty Programs
Sony offers an official loyalty program called PlayStation Stars that rewards users for simply engaging with their console. By completing straightforward digital campaigns, checking out specific monthly releases, or earning target trophies, you accumulate points that carry real-world value. These accumulated points can eventually be redeemed for wallet funds to purchase anything on the store.
Smart enthusiasts routinely track these challenges within the official mobile app to maximize their passive earnings during regular play sessions. Over time, these small bonuses stack up to fund full game purchases without out-of-pocket expenses. It serves as an excellent, completely legal method to convert your standard gaming habits into tangible financial rewards.
Utilizing Publisher Demos and Timed Beta Trials
Before major software releases hit the market, publishers frequently host public testing periods or release standalone gameplay demonstrations. These limited slices of gameplay offer excellent opportunities to experience current-generation mechanics completely free. Participating in beta tests also gives you a direct hand in shaping the final performance variables through developer feedback loops.
Additionally, progress made during modern trial weekends often transfers directly over to the final release if you choose to acquire it later. These promotional periods are regularly announced on official community dashboards and store storefronts throughout the year. Keeping an eye on seasonal publisher showcases ensures you can test-drive premium releases ahead of the general public.

Persona 5 Royal June Thirteenth Classroom Answers
Navigating the academic curriculum at Shujin Academy is a core element of the daily routine in Persona 5 Royal. While exploring dangerous palaces and managing social relationships takes up much of your time, answering pop quizzes correctly is essential for improving your social stats. Securing these academic bonuses helps you maximize efficiency without wasting valuable free time in the evening.
The Importance of Classroom Questions
Every correct answer you provide in class gives a direct boost to your Knowledge stat without consuming any time. This allows you to rapidly build your social standing and unlocks advanced dialogue options with crucial confidants later in the game. Keeping track of specific dates guarantees that you never miss a chance to impress your teachers and peers.
Failing to answer these sudden prompts correctly can slow down your overall academic progression significantly. By keeping the correct solutions nearby, you can easily maintain a perfect streak throughout the school semester.
The Correct Answer for June Thirteenth
On June 13th, your teacher will present a unique question regarding how certain visual perceptions and color interpretations function in society. The correct choice to select from the multiple-options list during this specific lecture is Green. Choosing this option will immediately grant you the approval of your instructor and increase your social points.
This particular question highlights the historical development of public safety signals and how colors were chosen for early transit systems. Understanding this context helps players appreciate the detailed trivia integrated into the game's academic segments.
Boosting Your Knowledge Stat Efficiently
Accumulating Knowledge points early in the year is vital for passing the competitive midterm and final exams with high marks. Achieving top scores on these tests provides an additional charm boost and earns praise from Sojiro Sakura back at Café Leblanc. This comprehensive loop makes daily participation in school highly rewarding for dedicated players.
Minimizing the time spent studying at the library or diner frees up your schedule for nighttime activities and palace exploration. Utilizing reliable guides for every classroom quiz ensures a balanced and highly successful playthrough.

Dreamlight Valley Star Path Guide
Disney Dreamlight Valley regularly introduces exciting seasonal events through its unique battle pass system known as the Star Path. These limited-time events allow players to complete various tasks in exchange for exclusive themed rewards, including elegant furniture and striking character outfits. Navigating these duties efficiently ensures you unlock all the magical cosmetics before the event concludes.
Understanding the Star Path System
The Star Path operates as a specialized progression track that updates alongside the game's major content releases. Players can engage with the standard track for free or invest premium currency to unlock additional reward tiers and extra duty slots. By spending moonstones to upgrade your pass, you gain access to the most coveted items and accelerate your overall progression rate.
Each event features a unique theme inspired by popular Disney and Pixar franchises, creating a diverse collection of decorative assets for your valley. The tokens earned from completing specific objectives are exclusive to that seasonal event shop. Consequently, any unspent event currency will expire once the active timeline reaches its final conclusion.
Efficiently Completing Seasonal Duties
To maximize your efficiency during the event, you should focus on stacking multiple compatible duties simultaneously. Many activities such as mining specific gems or fishing in particular biomes can be combined to save precious hours of gameplay. Recent updates have streamlined this process by removing tedious requirements that tied progression to highly specific character unlocks.
Prioritizing tasks that involve time-gated mechanics like harvesting crops or clearing daily obstacles will keep your momentum steady. For instance, planting large patches of fast-growing vegetables can quickly satisfy multiple agricultural requirements at once. Keeping a balanced rotation of active duties ensures that you never get stuck on a single difficult objective.
Maximizing Your Token Rewards
Tokens serve as the essential currency required to unlock prizes across the various event pages. Every completed duty rewards you with a set amount of tokens, which can then be redeemed sequentially or saved for higher tiers. Managing these points systematically allows you to prioritize the items that best complement your current valley layout.
Reaching the final page of the progression track unlocks the highly anticipated bonus rewards tab. This section allows dedicated completionists to convert their excess event tokens back into valuable premium currency. Investing time into clearing the entire list of duties eventually minimizes the overall net cost of the premium pass upgrade.
Managing Moonstones Wisely
Smart resource management is crucial for players who want to participate in every sequential seasonal event without spending real money. The initial investment required for the premium track can feel steep, but the event naturally refunds a significant portion of that currency through standard progression. Ensuring that you participate in daily challenges provides a steady influx of extra moonstones to fund your future passes.
Deciding between the standard premium pass and the bundle option depends heavily on your available playtime. The advanced bundle offers a head start by providing extra tokens immediately, which is ideal if your schedule limits daily gaming sessions. By planning your currency usage ahead of time, you can comfortably sustain your premium access throughout the year.

Strategic Planning for High-Level Competition
Succeeding in high-level competition requires much more than basic talent or intense daily practice routines. Top-tier performers must build comprehensive mental frameworks that guide their decisions under extreme stress on the grand stage. This deep level of preparation ensures that every action aligns with long-term performance goals.
The Core of Competitive Dynamics
Achieving sustained excellence begins with a systematic breakdown of your competitive environment and overall structural challenges. Analyzing potential scenarios allows individuals to uncover hidden vulnerabilities while safeguarding their primary strengths from unexpected disruptions. This thorough analytical approach prevents costly mistakes when the pressure reaches its peak during major tournaments.
Furthermore, elite competitors understand how to balance aggressive tactical advancement with careful risk mitigation strategies. Moving forward blindly without a solid defensive framework often results in sudden setbacks against seasoned opponents. Evaluating every option beforehand establishes a more reliable path toward achieving consistent victory.
Adapting under Intense Pressure
No master plan completely survives direct contact with an equally skilled opponent on the field. True elite status belongs to those who maintain cognitive flexibility when the landscape shifts unexpectedly. This ability to pivot strategies mid-match separates regular participants from actual champions of the discipline.
Controlling emotional responses during critical turning points heavily impacts the final result of any major encounter. Panic usually clouds logical judgment, causing errors that give opponents an immediate advantage over the field. Developing inner calm helps you identify the perfect moment to exploit a sudden mistake from the opposing side.
Optimizing Performance Infrastructure
Behind every brilliant competitive achievement lies a sturdy operational foundation that actively maintains performance quality over time. Correctly distributing training resources guarantees steady professional growth throughout the most demanding phases of a career. Dedicated individuals always value structural longevity over brief advantages that might deplete their long-term capabilities.
Learning to coordinate multiple responsibilities at once dramatically increases overall efficiency across the entire playing field. You can visit reliable platforms like M88bet to observe how organized modern systems handle strategic challenges within high-stakes environments. Refining this logistical balance ultimately secures your position during intense tournament runs.
Developing a Master Mindset
Reaching the peak of professional execution comes down to deliberate practice combined with honest evaluation after every performance. Studying past outcomes highlights repetitive errors that need immediate adjustment before the next major challenge arrives. Over time, this constant evaluation refines the sharp instincts needed to control complex scenarios.
Every minor setback provides invaluable data that improves your future planning and overall situational awareness. Transforming difficult moments into educational lessons ensures continuous adaptation against evolving opposition. Through unwavering discipline and focused implementation, any dedicated challenger can reach the highest ranks of competitive success.